Device Activation and Connection
The Lixel K2 is connected, activated, and managed through the LixelGO mobile app. This chapter covers the LixelGO installation requirements and the complete device activation and connection workflow.
LixelGO Introduction
LixelGO is the companion mobile app for the Lixel K2. It lets you view and manage projects and manage digital 3D spatial assets. Scan the code or search the app store to install the latest version of LixelGO.
Recommended Installation Environment
Phone configuration requirements
| Module | Requirement |
|---|---|
| CPU | Snapdragon series, Snapdragon 8 or above recommended |
| RAM | Minimum 8 GB |
| Display chip | Dedicated display chip |
| Other | Supports Bluetooth, wireless hotspot, and USB tethering |
Examples of verified compatible models
| Brand | Model | CPU | RAM | GPU |
|---|---|---|---|---|
| VIVO | IQOO NEO 6 | 1st-gen Snapdragon 8+ mobile platform | 12 GB | Adreno 730 |
| Redmi | Redmi K50 E-sports Edition | Qualcomm Snapdragon 8 Gen 1 | 8 GB | Adreno 730 |
| Huawei | Huawei P50E | Snapdragon 778G | 8 GB | Adreno 642L |
| OPPO | OPPO K20 | Dimensity 8000-MAX mobile platform | 8 GB | Mali-G510 MC6 |
Device Activation
The complete workflow includes: register and log in to LixelGO, power on the device, connect the device, device management, device activation, and requesting a LixelStudio activation code.
1. Register and Log In to LixelGO
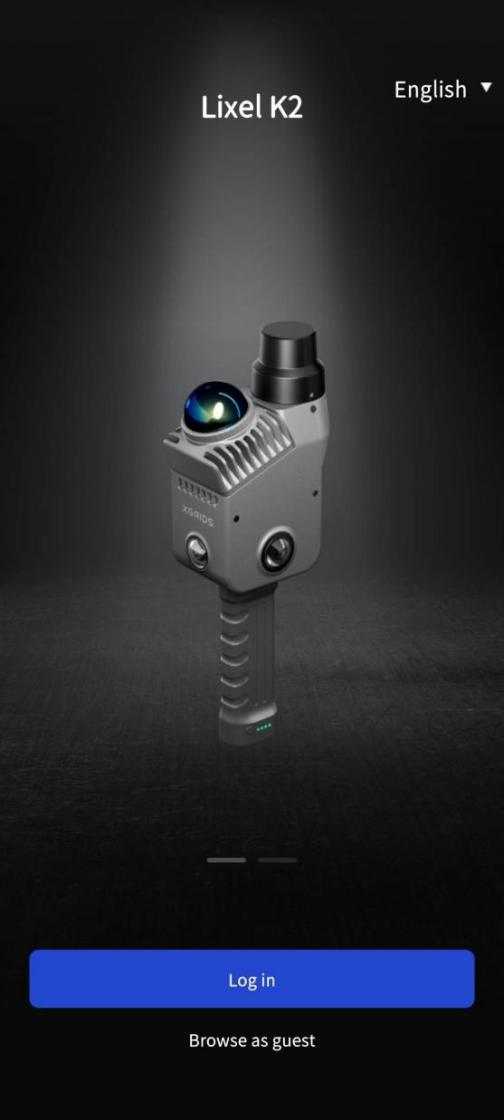
(1) Install and open LixelGO.
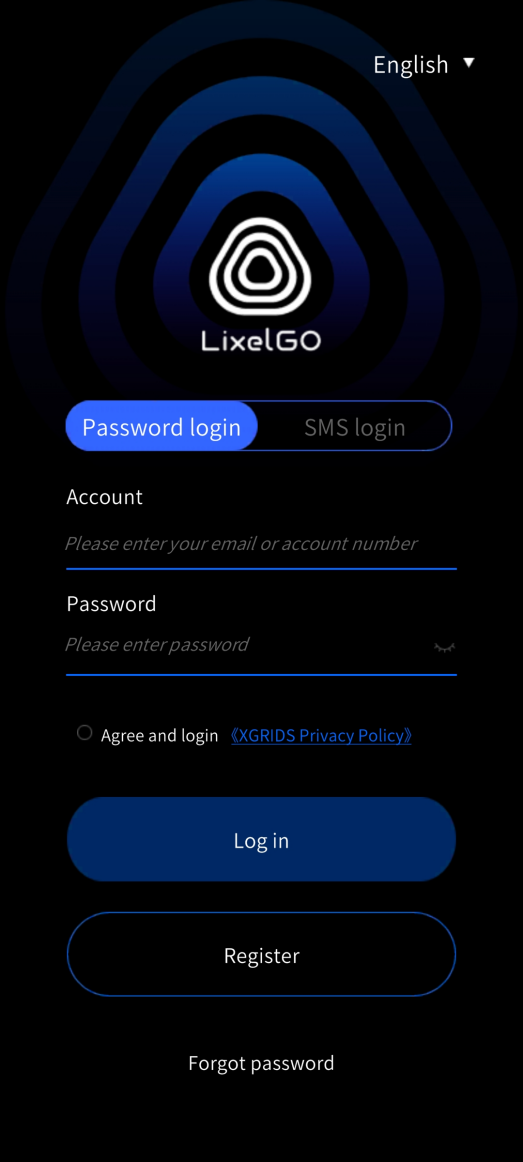
(2) Tap One-tap Login to enter the login/registration screen.
(3) Choose one of the following:
- New user registration: register by email or mobile phone number.
- Existing account login: log in with account and password, or by SMS verification code.
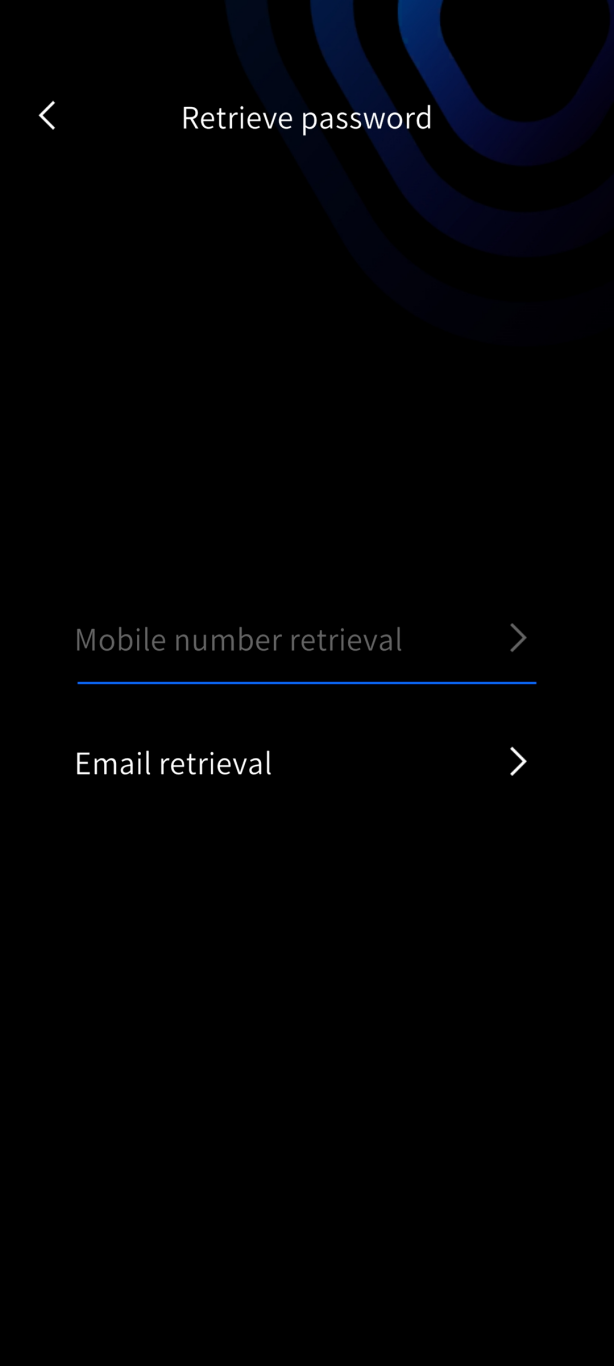
- Forgot password: tap Forgot password and reset it via the registered phone number or email.
(4) Switch language:
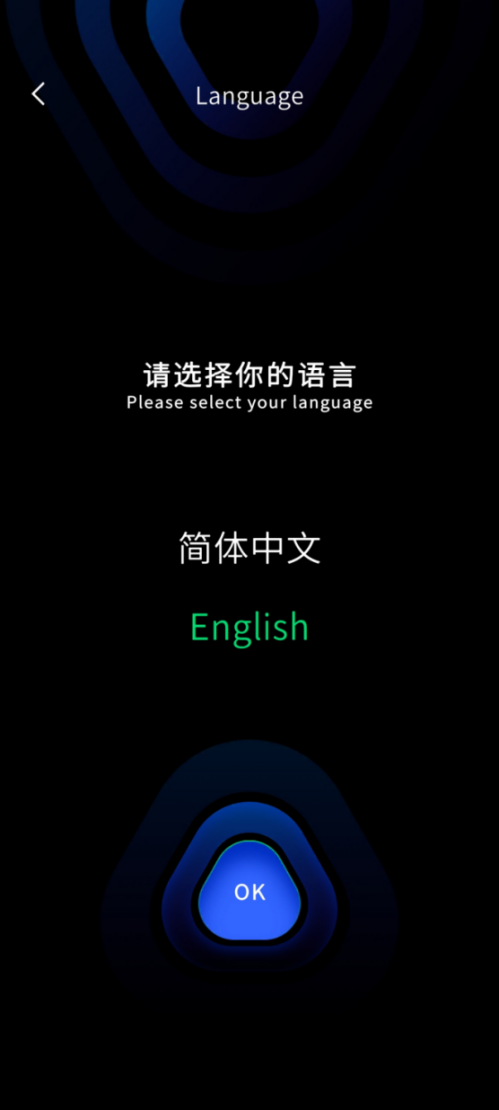
By clicking on the lower right corner of the screen to setting and switch languages, currently supports Simplified Chinese and English two language modes.
2. Power On the Device
Press and hold the power button to turn on the handheld scanner. When the indicator light changes from fast-flashing blue to solid green, startup is successful.
3. Connect the Device
Adding a device works slightly differently on Android and iOS. Three connection methods are available: Quick Connect Mode (recommended), Hotspot Mode, and Bridge Mode.
Android version
Quick Connect Mode (Recommended)
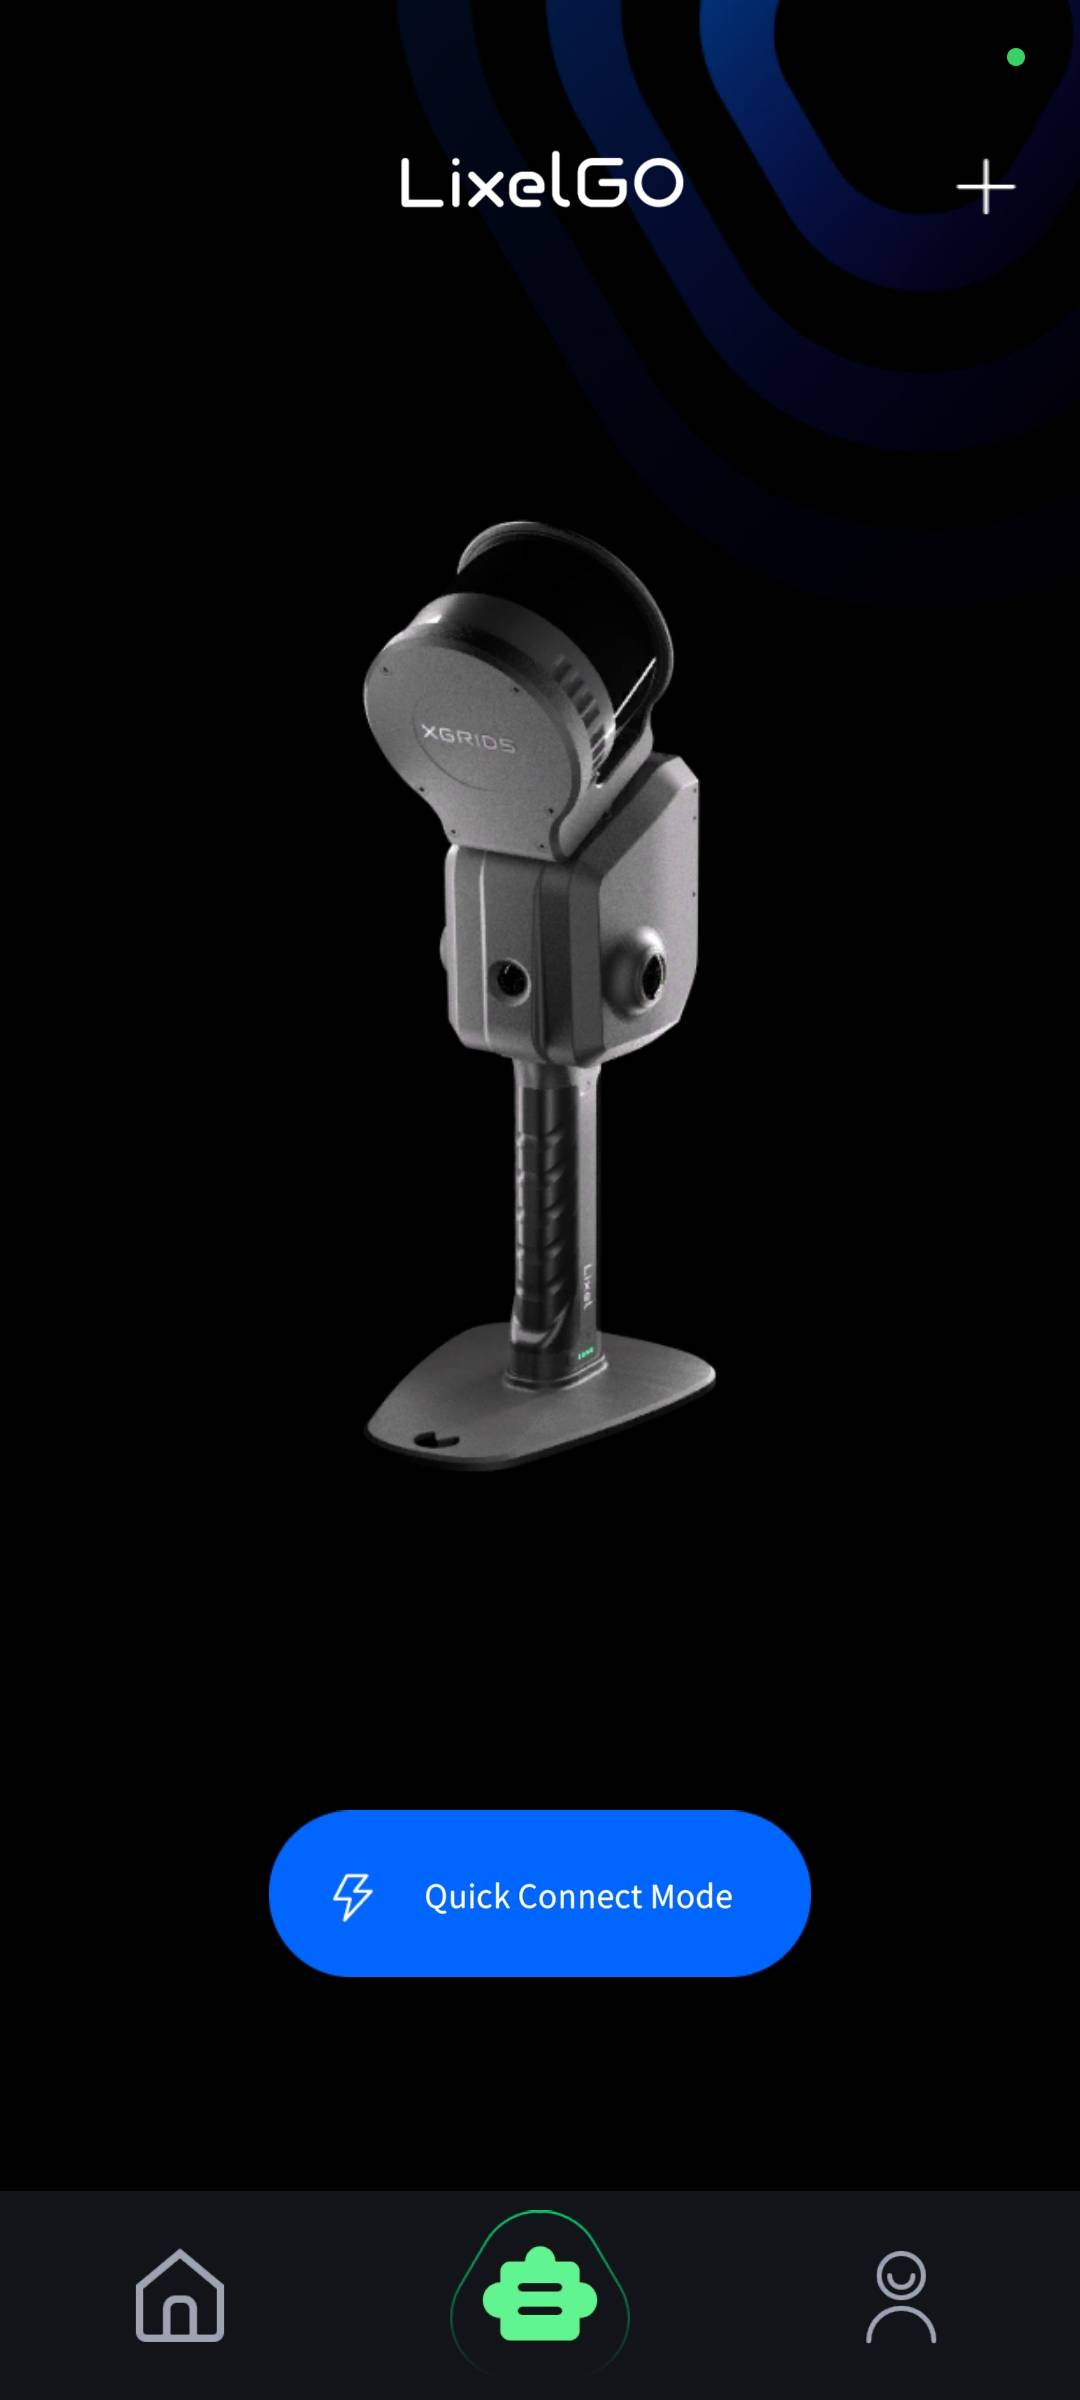
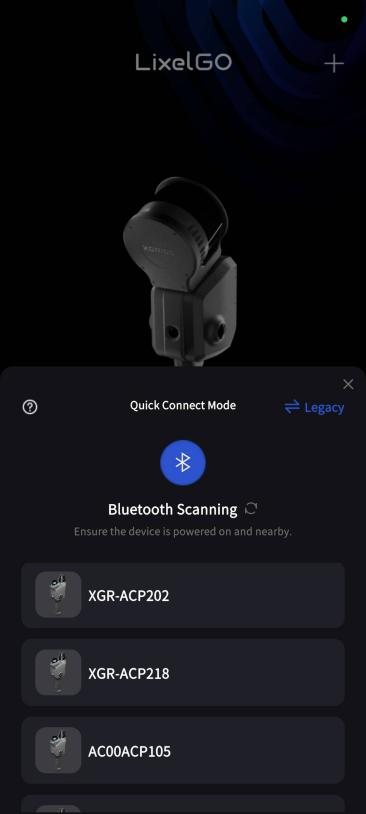
(1) On the LixelGO home page, tap Quick Connect Mode; the app automatically searches for nearby devices.
(2)Find your target device in the list (for example XGR-ACPJ02 or AB00001003) and tap to connect.
(3)Select your phone brand as prompted (SAMSUNG / PIXEL / XIAOMI / OPPO, etc.); the app automatically reads the device's network configuration.
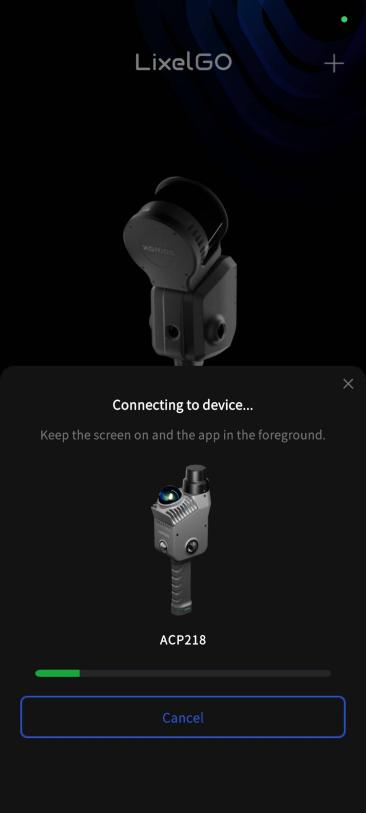
(4)Tap and select the device Wi-Fi and wait for the connection to complete.
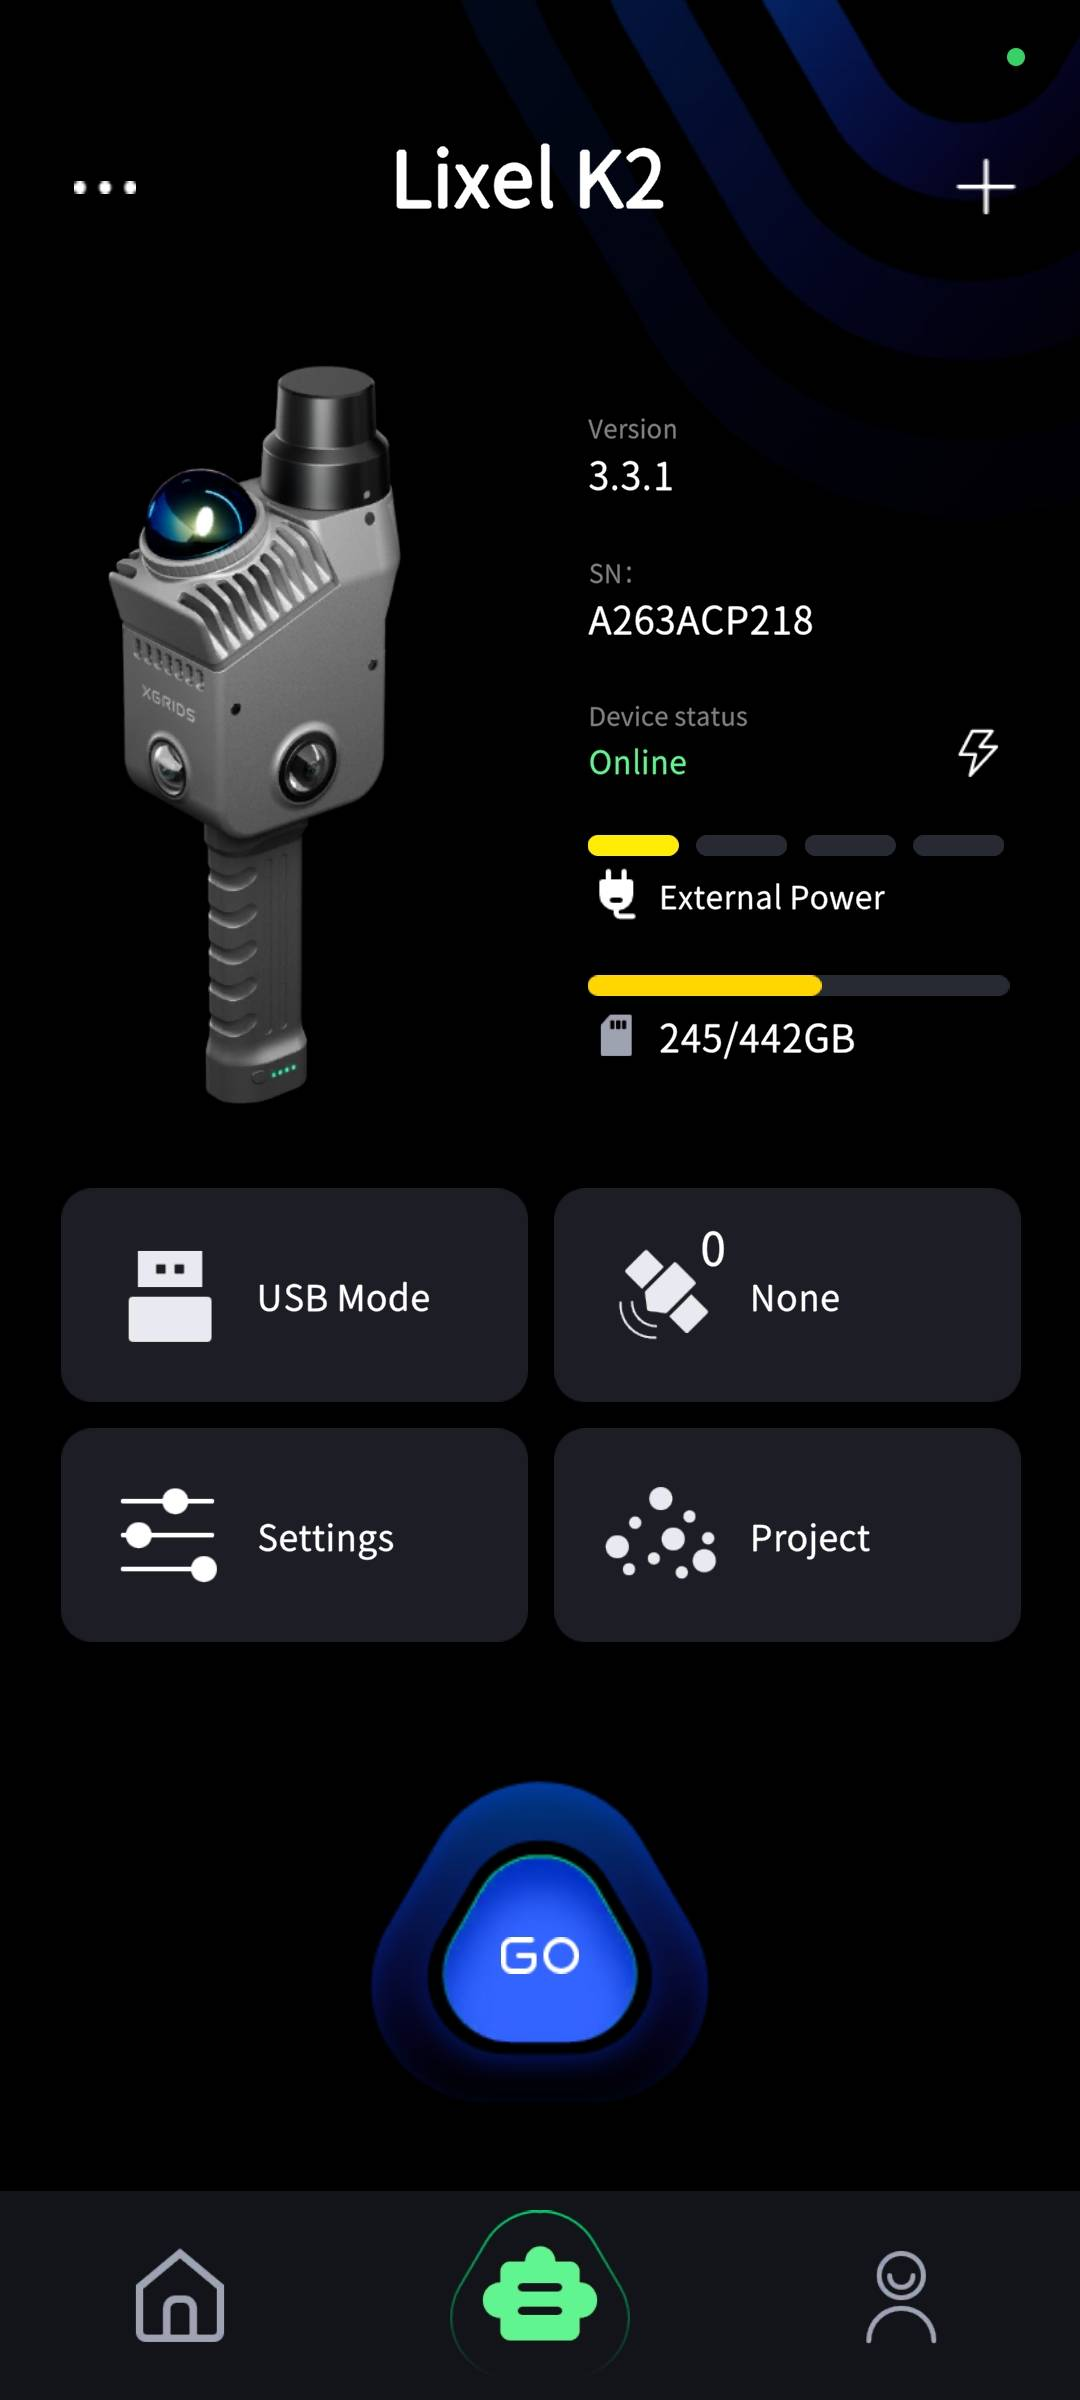
(5)Once connected, the screen shows device information: model (e.g. Lixel K2), firmware version (e.g. 3.3.1), serial number, storage, and status such as USB mode, calibration, and point count.
(6)Tap the blue GO button in the lower-right corner to enter the device workspace.
Tip
Quick Connect Mode requires a one-time Wi-Fi setup on first use; subsequent connections are faster and easier.
Hotspot Mode
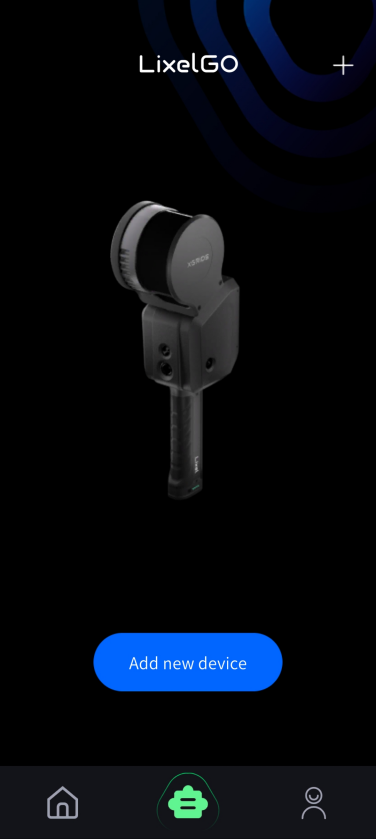
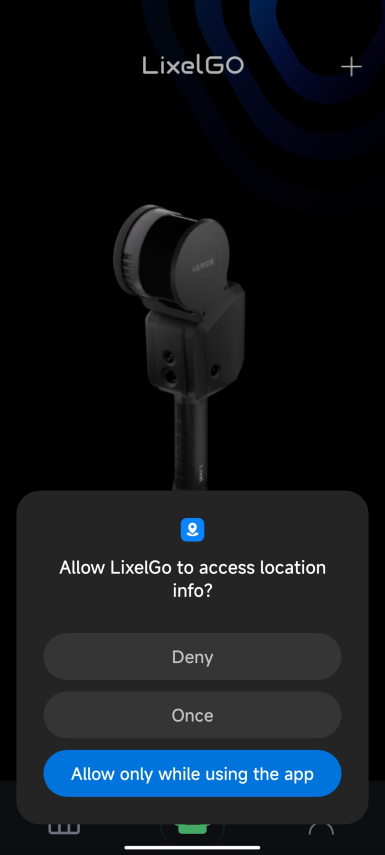
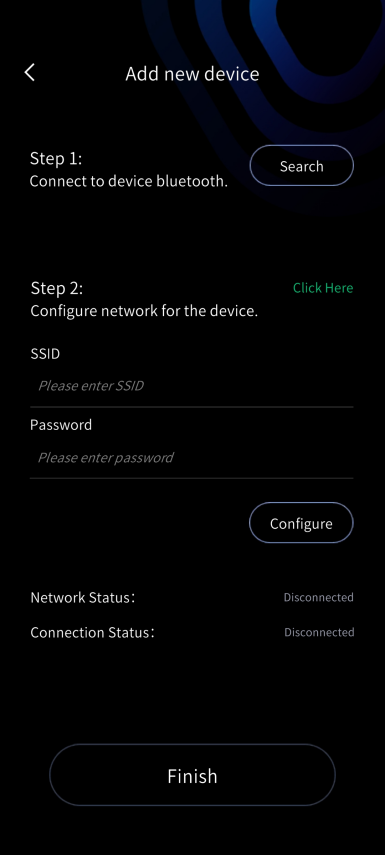
(1) In LixelGO, tap Add Device and grant the required permissions.
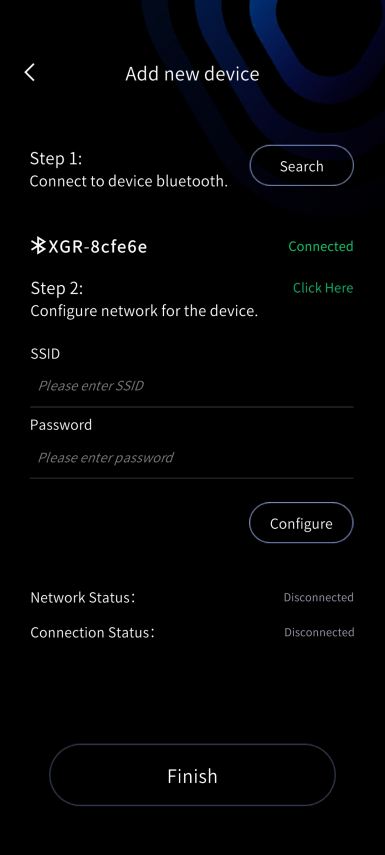
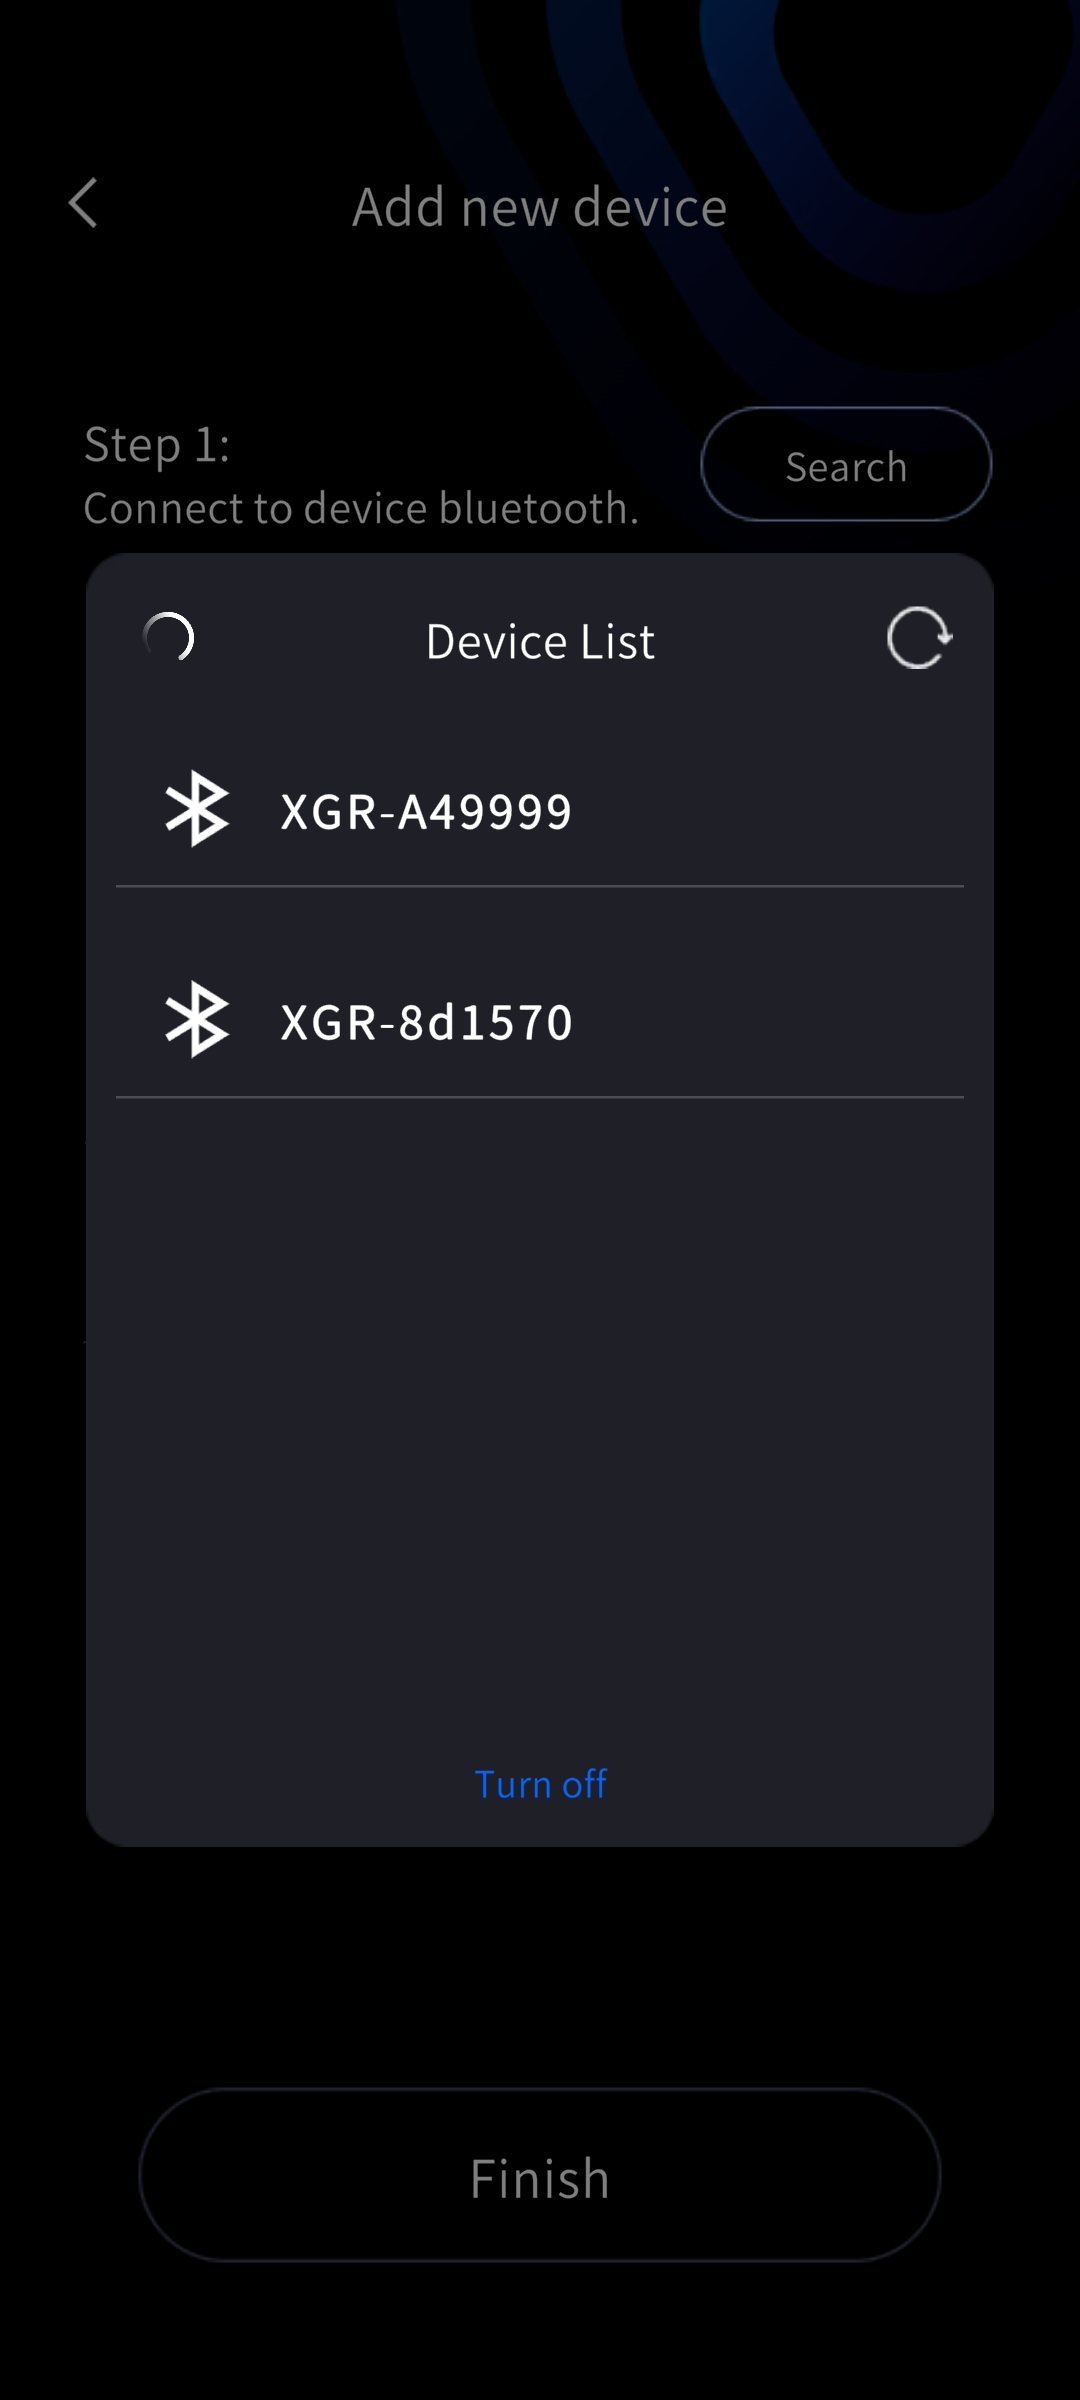
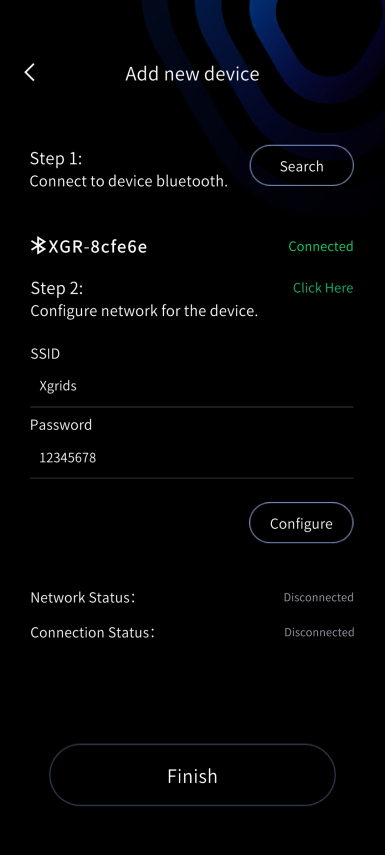
(2) Turn on your phone's Bluetooth, search, and connect to the device's Bluetooth.
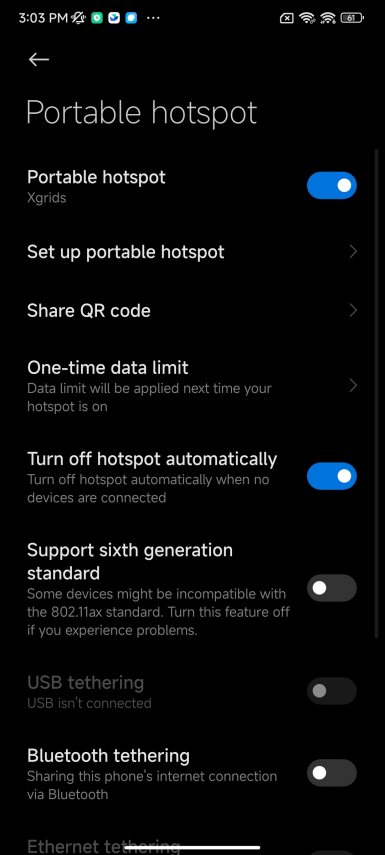
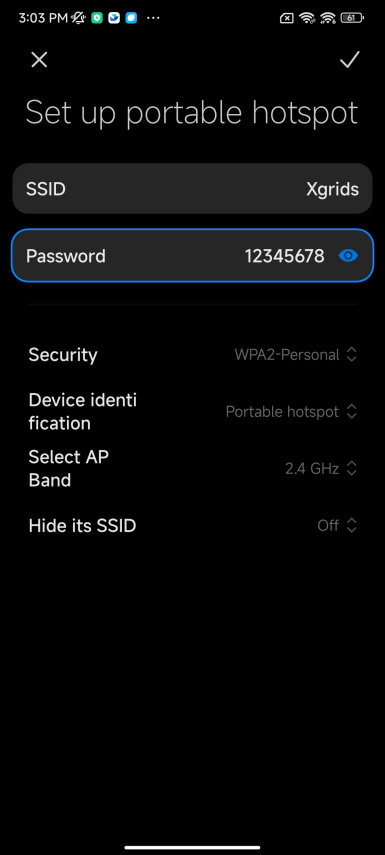
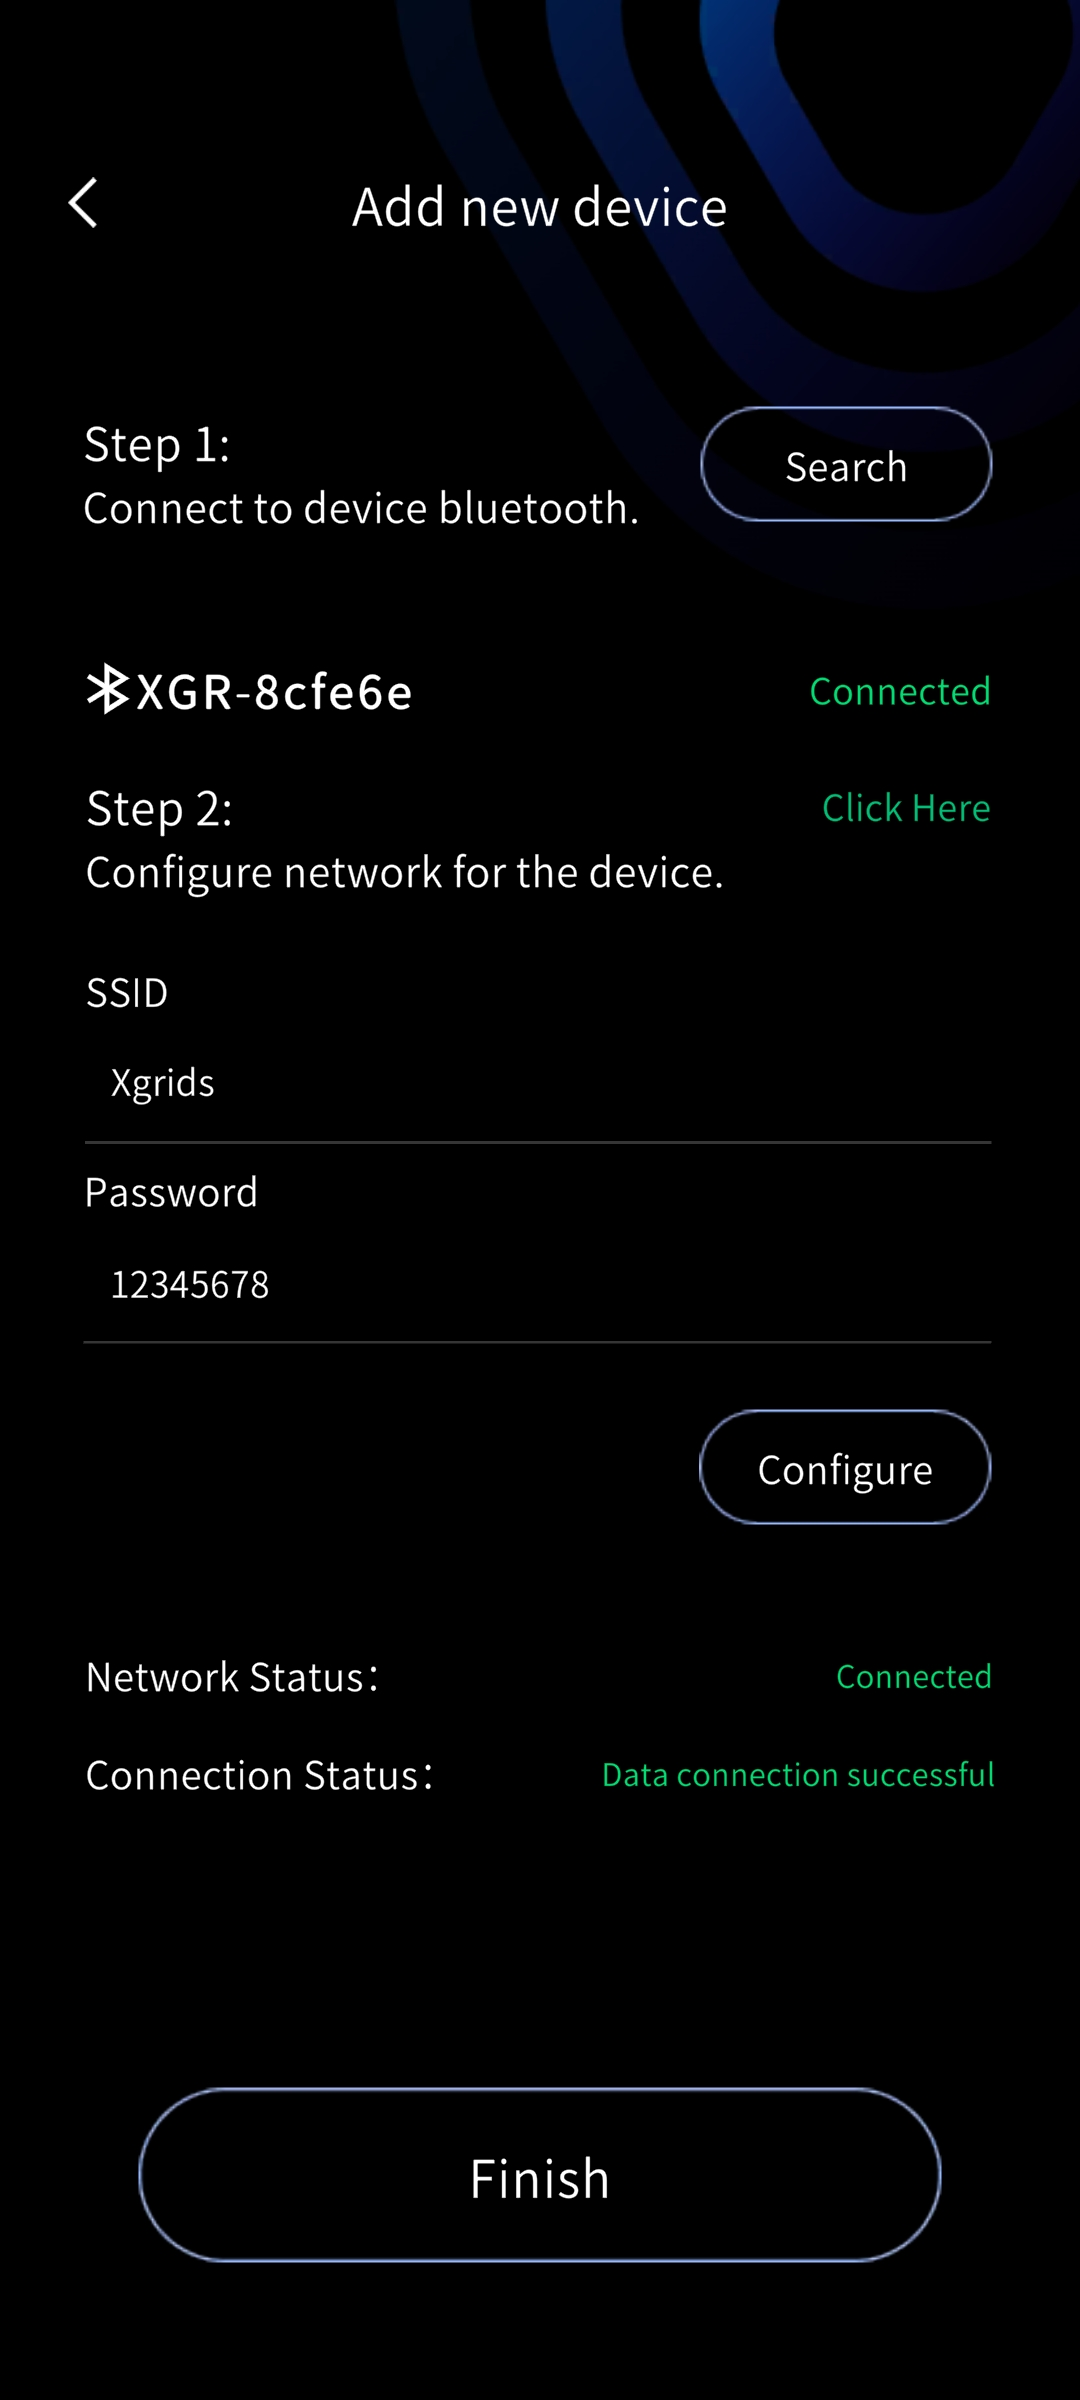
(3) Turn on your phone hotspot, enter the hotspot name and password, tap Configure, and the device automatically connects to the phone hotspot.
(4) When both the network and data connection statuses show success, tap Finish to view the basic information of the connected device.
Tip
Keep the hotspot name and password as simple as possible to avoid connection failures.
Bridge Mode
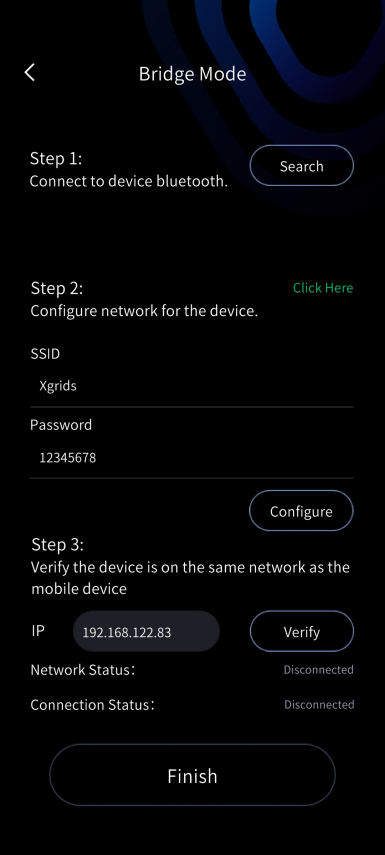
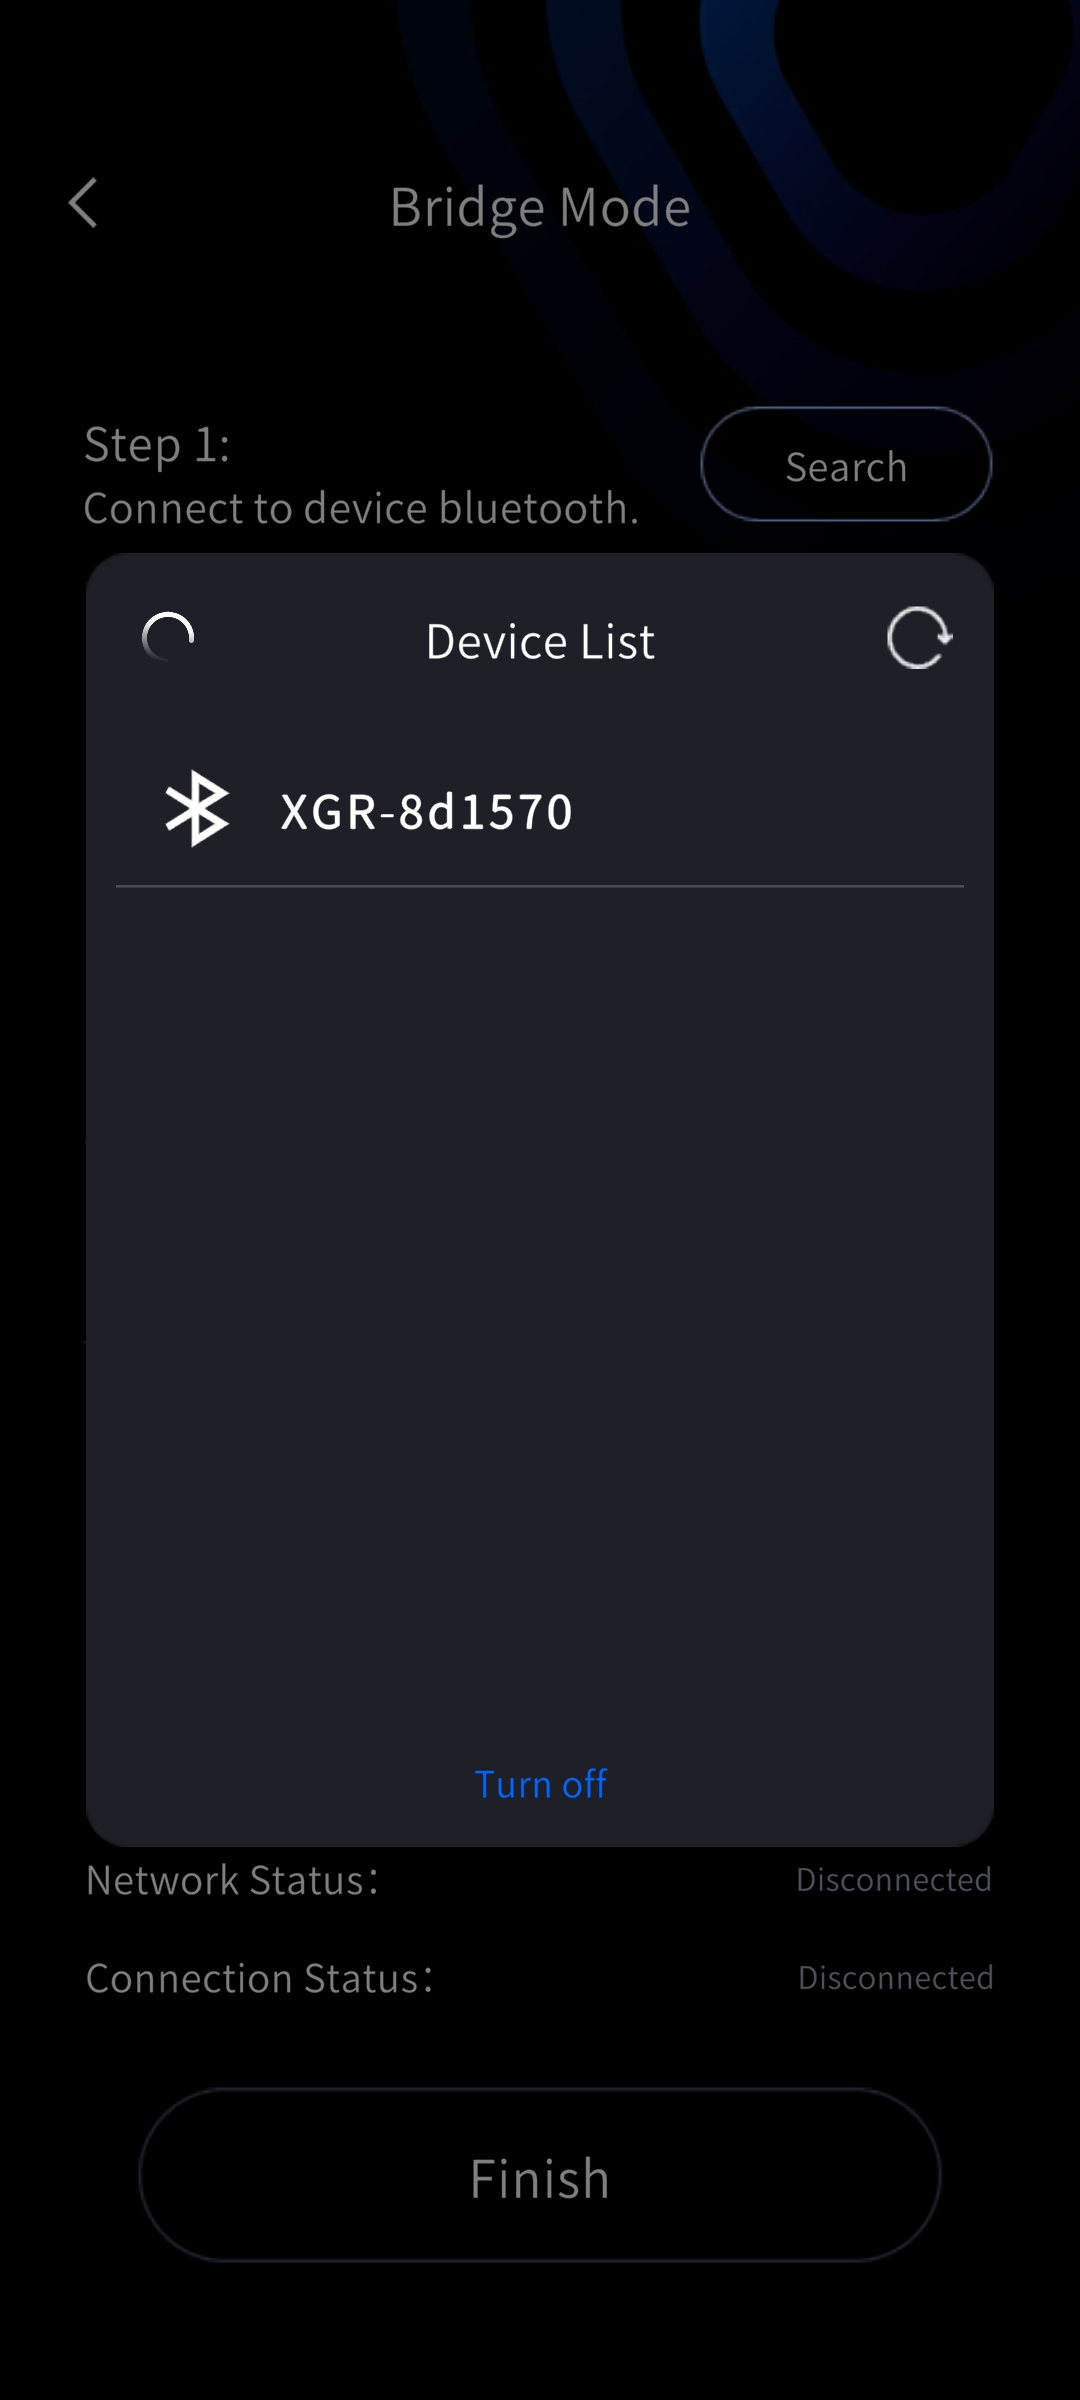
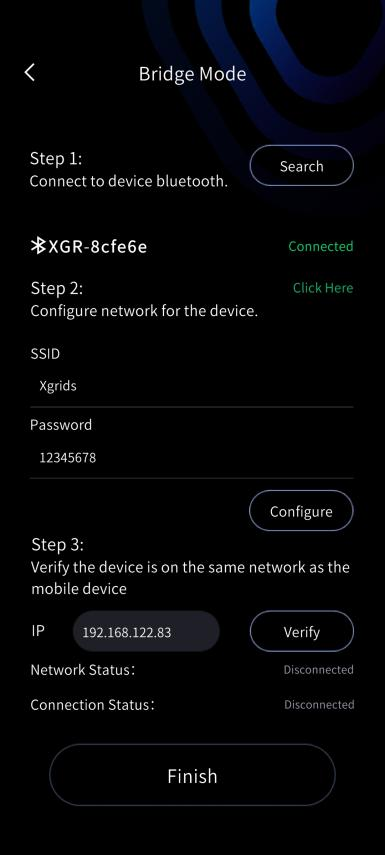
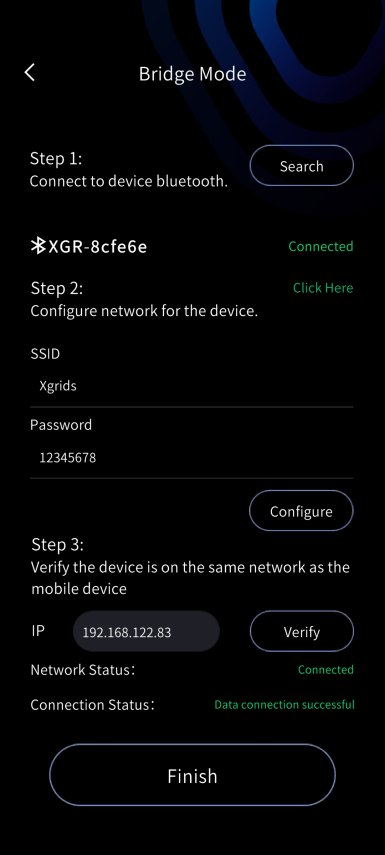
Tap the plus sign in the upper-right corner, select Bridge Mode, and follow the on-screen steps. First search for and connect to the device's Bluetooth, then configure and verify the network. After connecting correctly, tap Finish to view the device's basic information.
iOS version
Quick Connect Mode (Recommended)
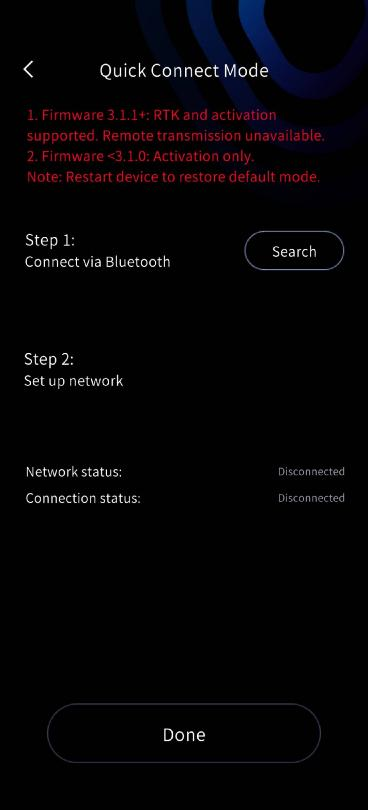
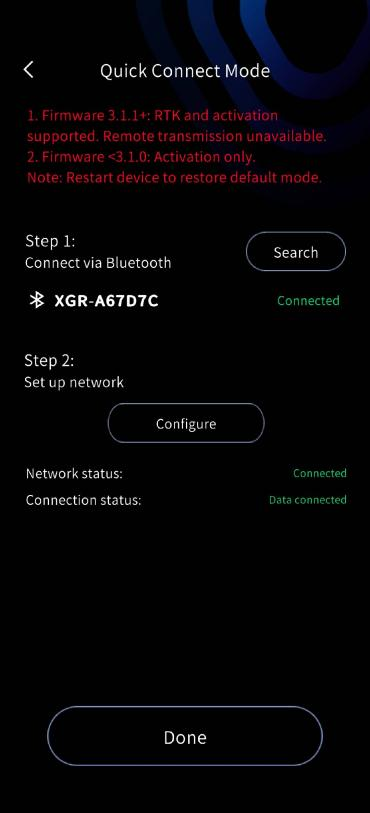
Quick Connect Mode is used by default. Press and hold the power button to turn on the scanner (the indicator light changes from fast-flashing blue to solid green), then follow the same steps as on Android: on the LixelGO home page tap Quick Connect Mode, select and connect your device, and once connected the screen shows the device information.
Hotspot Mode
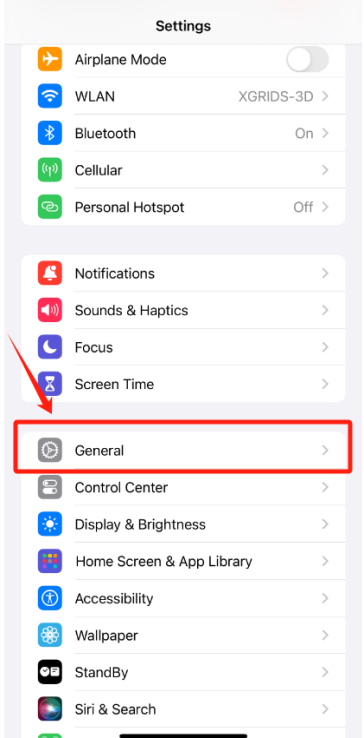
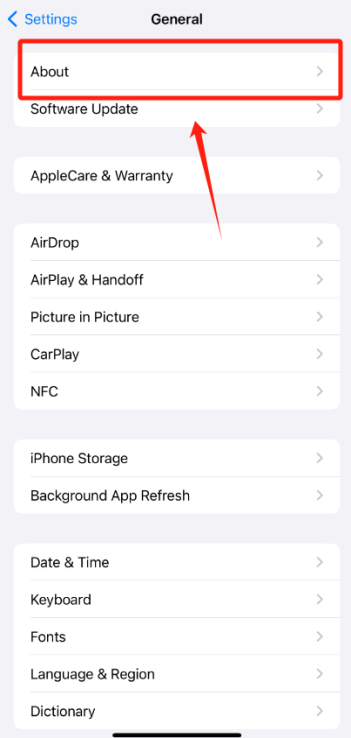
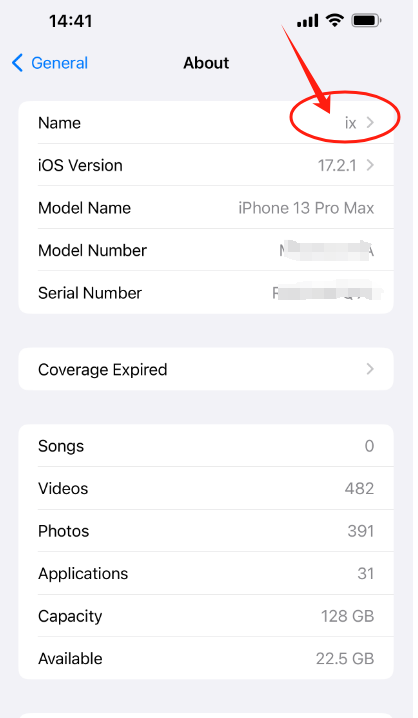
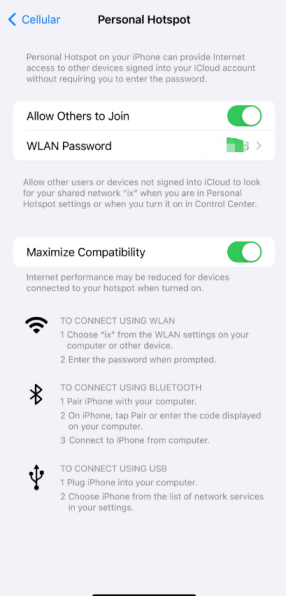
Before using the app, configure your iPhone first: go to Settings → General → About and change the Name field so it contains only English letters, with no spaces or special characters. This name is used as the phone's hotspot SSID. Then turn on the phone's Bluetooth, connect to the device's Bluetooth, turn on the hotspot, enter the name and password, and tap Configure.
Direct Connect Mode
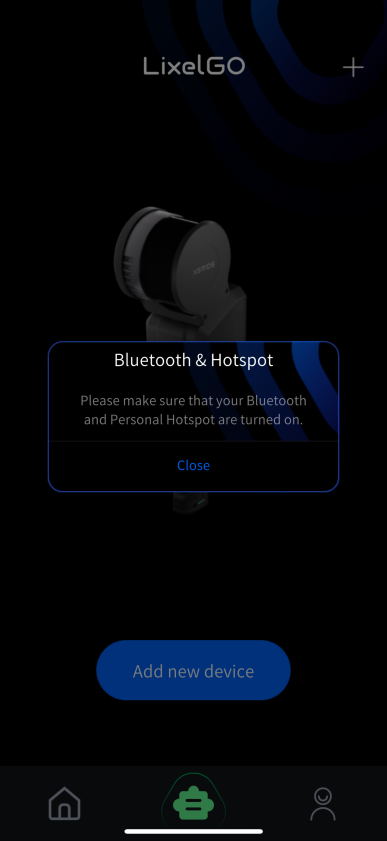
- Press and hold the power button to turn on the Lixel K2. Tap Add new device, tap close, and then follow the steps.
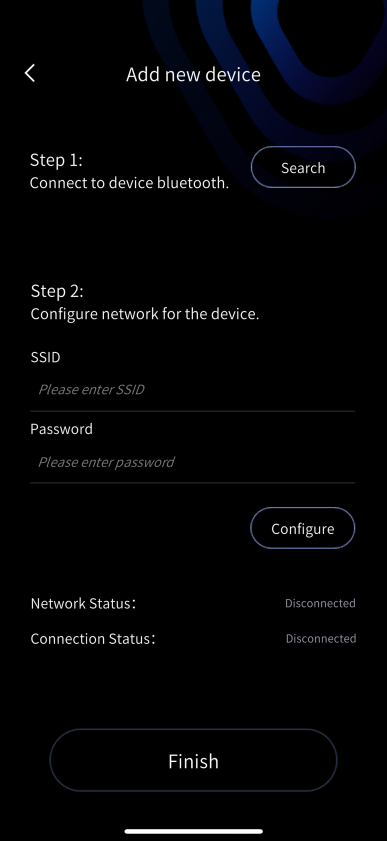
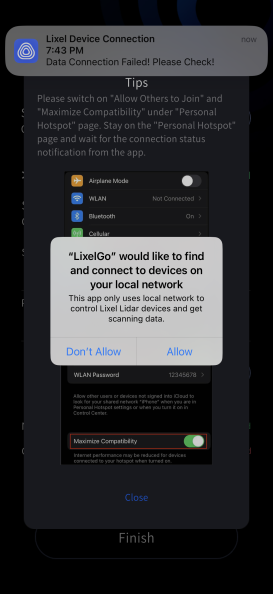
- First-time connection: grant the requested permissions — tap Allow, select WLAN & Cellular, and tap Allow again.
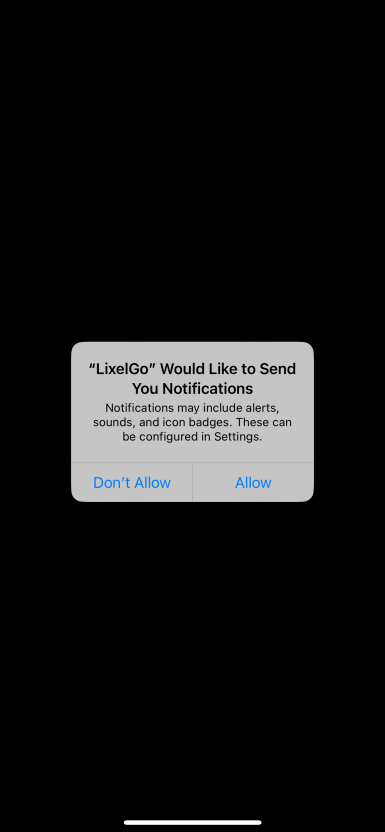
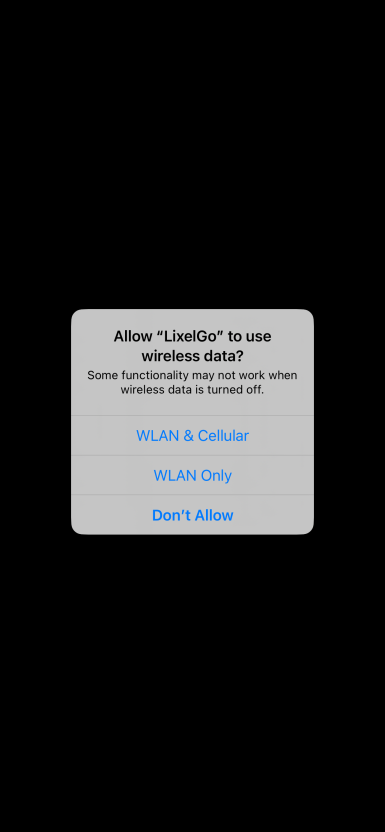
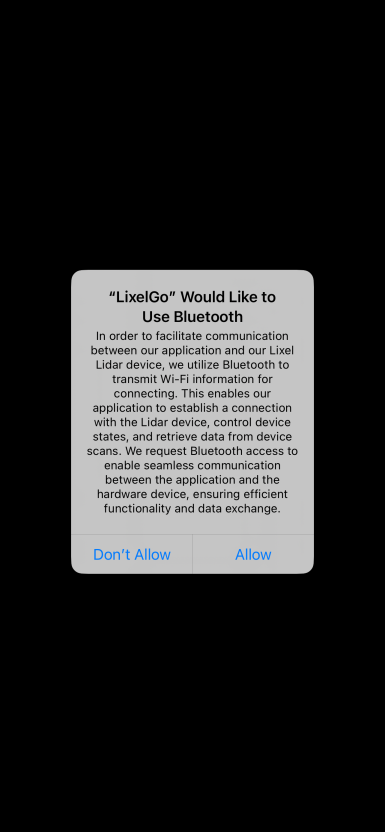
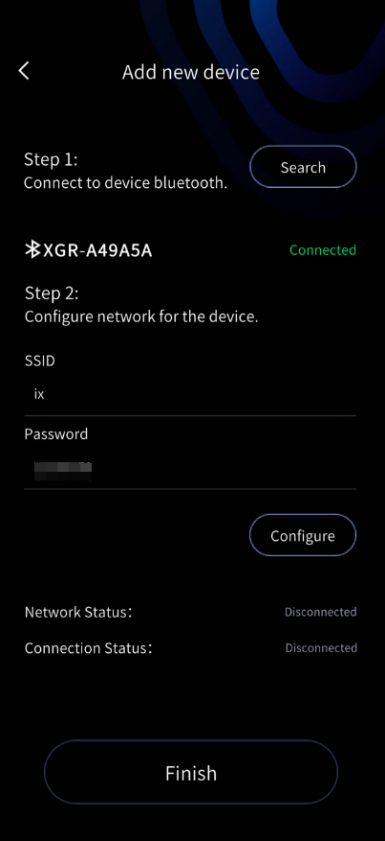
- Turn on the phone's Bluetooth and connect to the device's Bluetooth, then configure the network: enter your iPhone's device name and hotspot password (keep the password as simple as possible), tap Configure, and read the tips carefully.
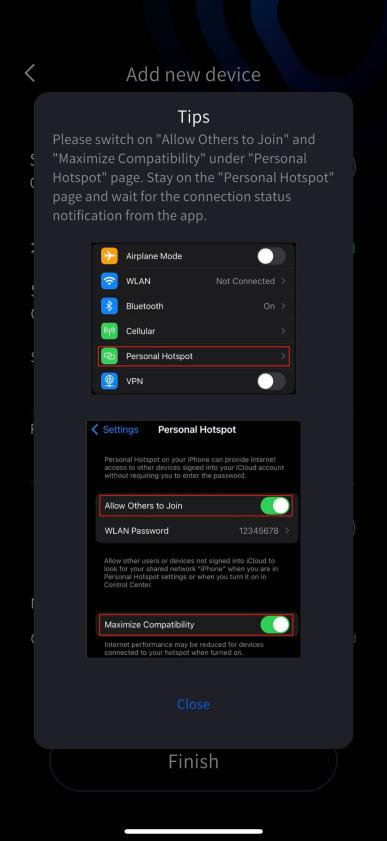
Note
When enabling the hotspot, cellular data (mobile network) must be turned on (changing the Wi-Fi connection status affects the hotspot toggle). Stay on the Personal Hotspot page to confirm the hotspot is enabled, make sure Allow Others to Join is on, and set compatibility to maximum. Only after you see "Data Connection Successful!" on the Personal Hotspot page should you return to the LixelGO app.
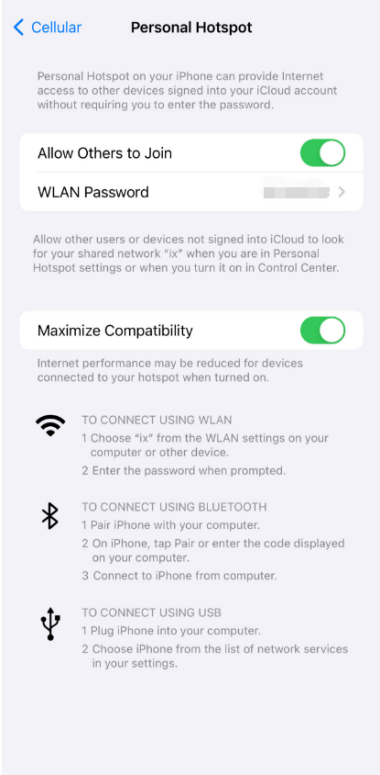
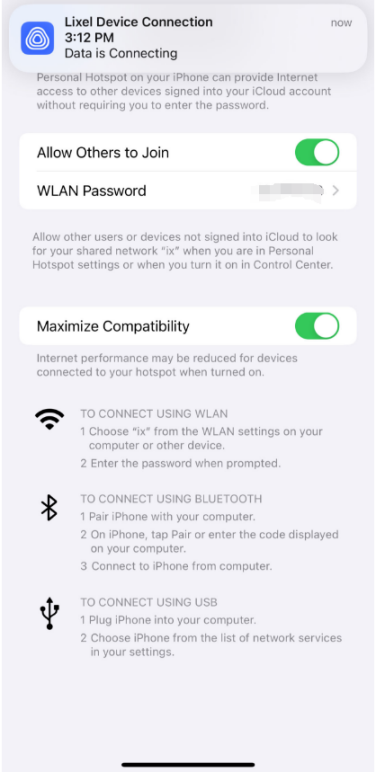
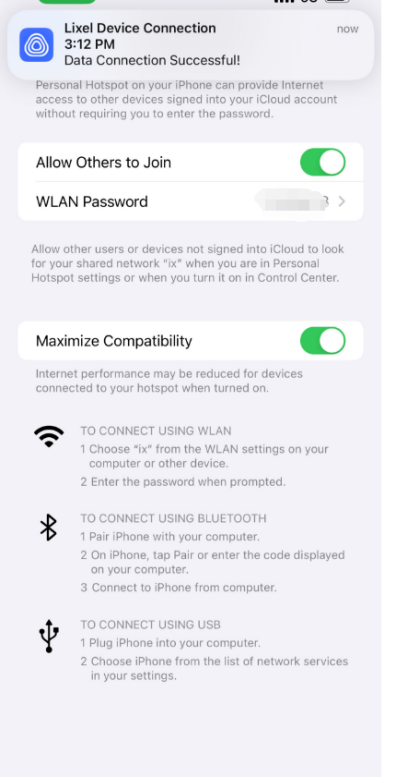
- On the first connection, the data connection may fail due to permissions. After returning to the app, tap Configure to trigger the permission dialog again; select Allow to establish the connection immediately.
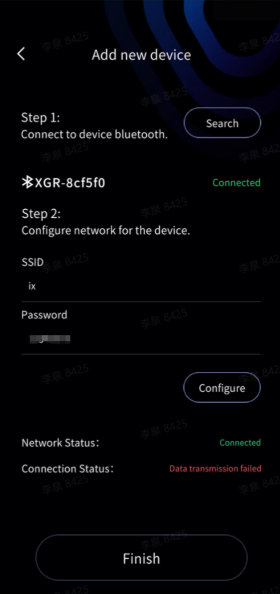
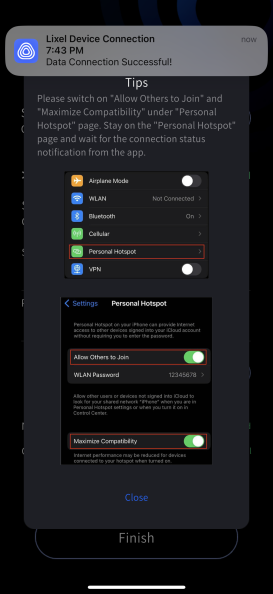
- When both the network and data connection statuses show success, tap Finish to view the basic information of the connected device.
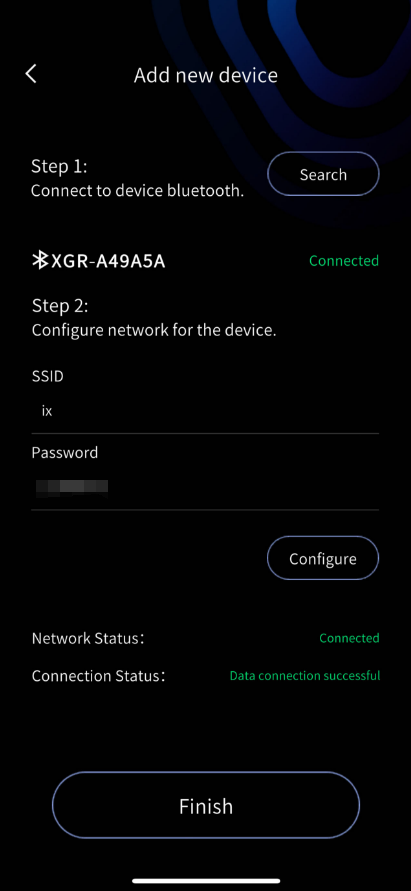
Bridge Mode
Tap the plus sign in the upper-right corner and select Bridge Mode. Tap close and go to the connect page: first search for and connect to the device's Bluetooth, then configure the network (see the Direct Connect Mode steps above for details). After connecting correctly, tap Finish to view the device's basic information.
4. Device Management
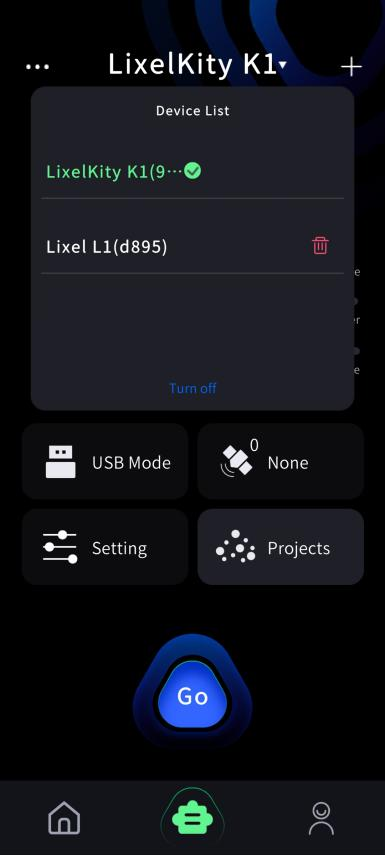
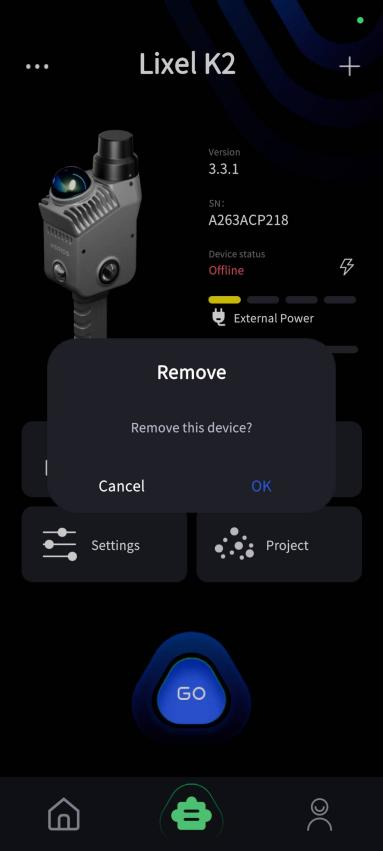
On the device screen, pull down the device name at the top to manage connected devices. Tap Remove Device to disconnect the device.
5. Device Activation
The first time you use the device, the activation page appears grayed out. Tap Connect and follow the prompts to complete device binding. Once activated, the device is ready to use.
6. Request a LixelStudio Activation Code
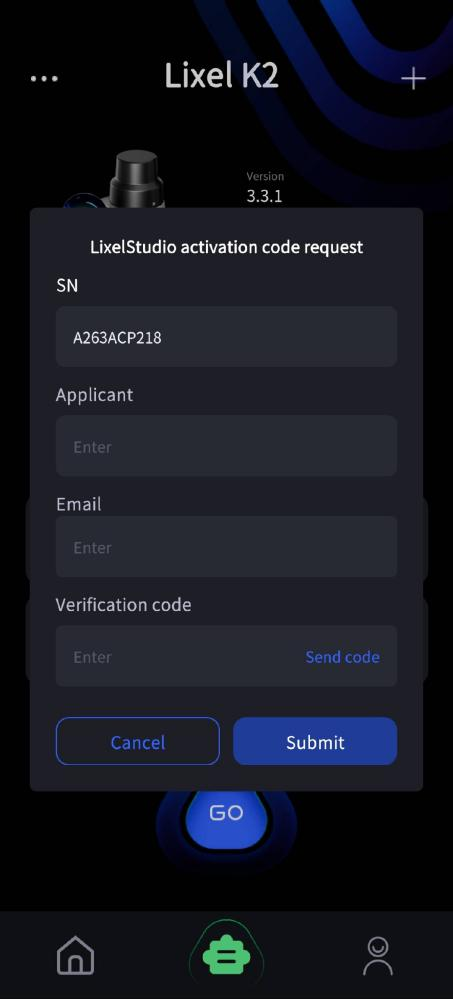
After device activation, LixelGO automatically opens the LixelStudio activation code request page, where you can request the code directly.
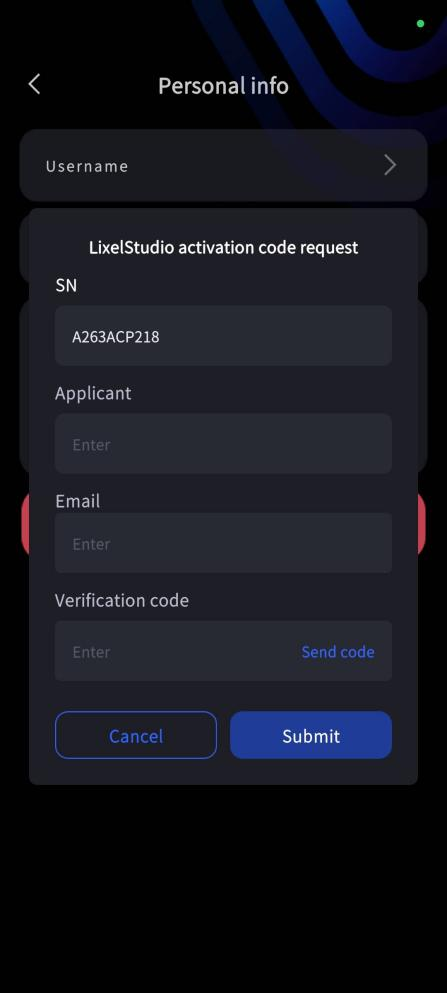
If you skip it for now, you can re-enter the request flow later via Me → Personal Info → Request LixelStudio Activation Code.