
Applications
This chapter covers industry applications, including volume calculation, volume comparison, enclosed volume calculation, and mesh generation.
Volume Calculation
Measure and calculate stockpile volumes from point cloud data.
- Select the point cloud.
- Click Volume Calculation
 .
.
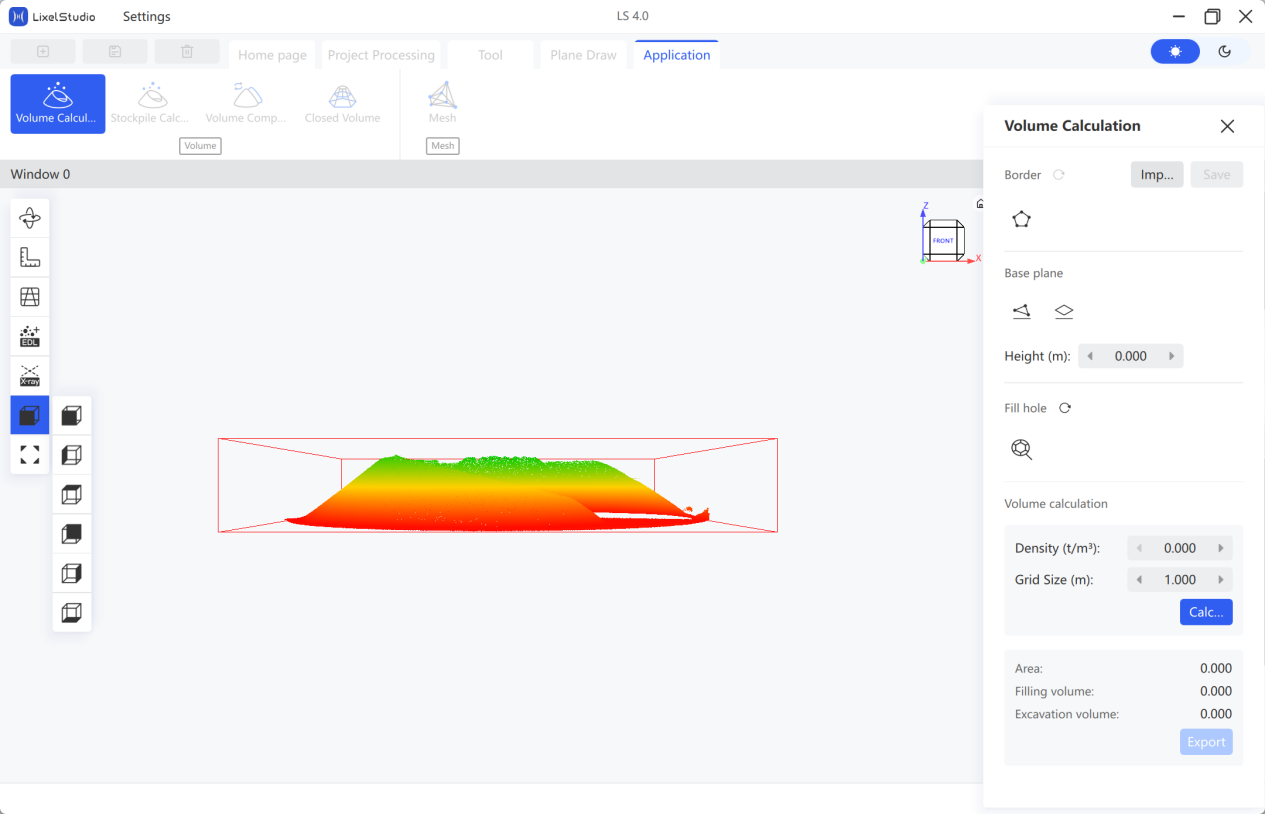
- Draw Border: Click Draw Border
 , left-click boundary points in the point cloud, and right-click to end. The stockpile range is auto-selected. Click the save button to save the border.
 - Select Base Plane:
- Method 1 — Three-Point Plane: Click the point selection button below the base plane, then click three points around the heap to draw the base plane.
- Method 2 — Horizontal Plane: Enter the base plane height in the popup. The base plane is auto-generated in the model.
- Fill Holes: Click Fill Holes
 , left-click to select points, and right-click to end. Click the reset button to reset the filling result if needed.
 - Set Mesh Parameters: Set the Mesh Density (the size of the point cloud mesh grid). Generally use the default parameters.
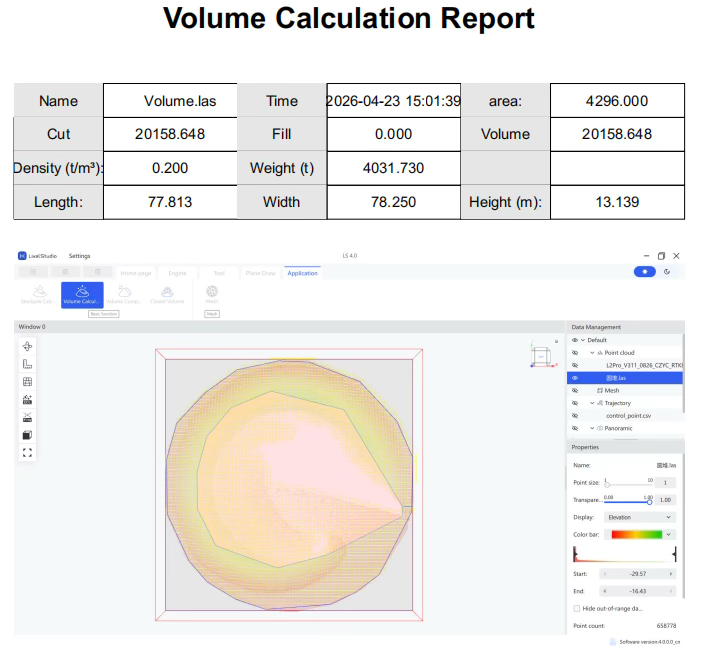
- Calculate: Click Calculate and view the results (filling volume, excavation volume).
- Export Report: Click Export Report, then select the save path and filename.
Volume Comparison
Compare two periods of stockpile data.
Note: The two periods of point cloud must maintain a consistent base plane. Registration is recommended.
- Select the point clouds.
- Click Volume Comparison
 .
.
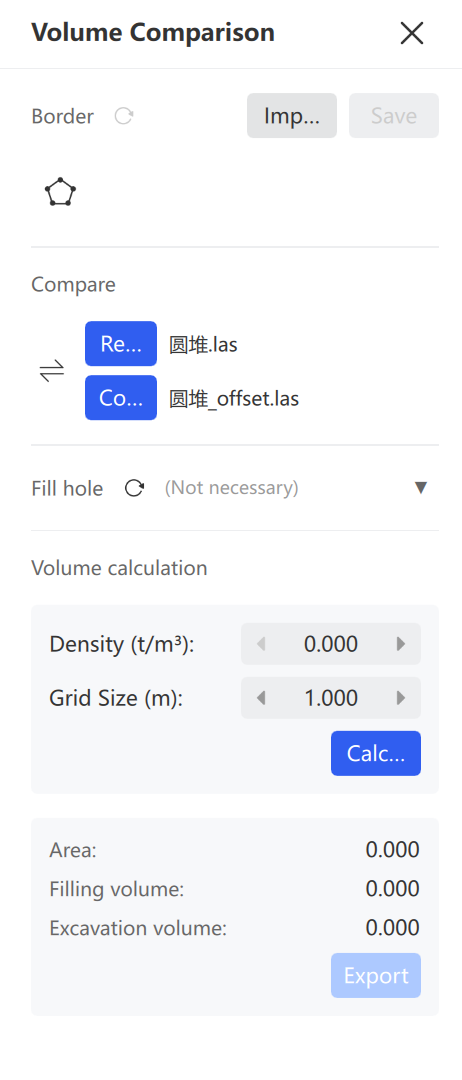
- Draw Border: Click Draw Border , left-click the boundary, and right-click to end. Click the save button to save the border.
- Confirm Base and Change: Identify which dataset is the base and which is the change. Click Switch
 to adjust if needed.
 - Fill Holes (Optional): Click the point cloud requiring hole filling and perform the operation.
- Set Mesh Parameters: Set the Mesh Density. Generally use the default parameters.
- Calculate: Click Calculate and view the comparison results.
- Export Report: Click Export Report, then select the save path and filename.
Enclosed Volume Calculation
Calculate the volumes of enclosed areas such as mine tunnels and cabins.
Note: Denoise and downsample the point cloud first so that the data contains only the calculation area.
- Select the point cloud.
- Click Enclosed Volume
 .
.
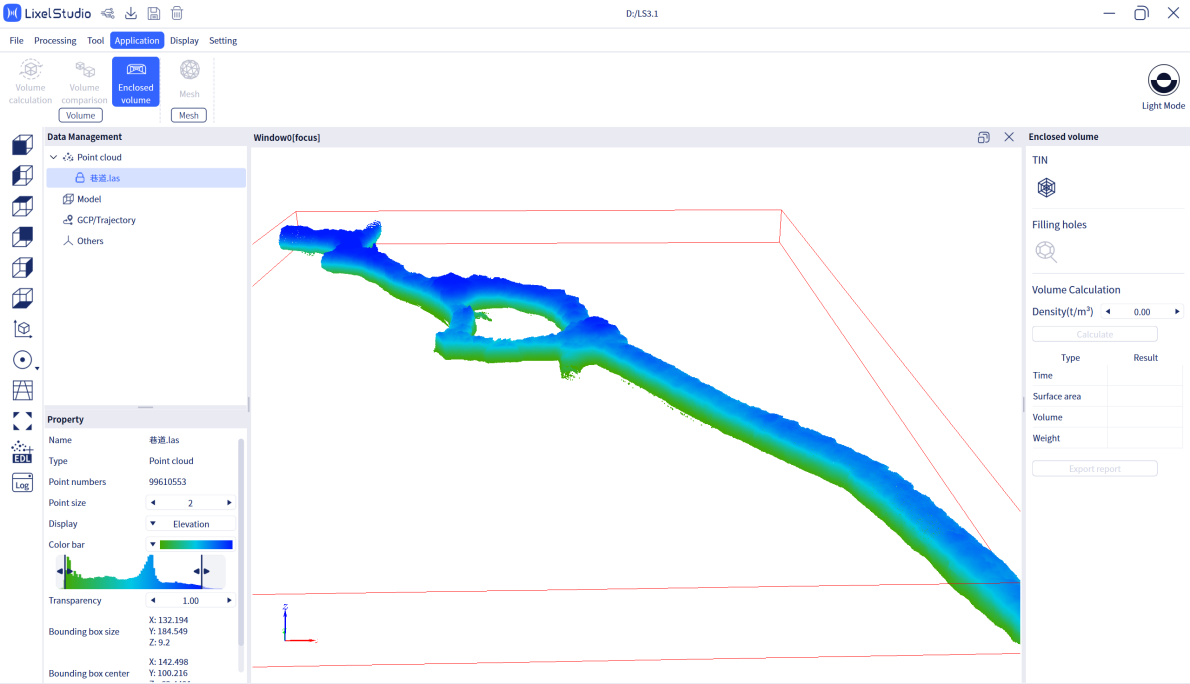
- Create Mesh: Click Mesh
 and wait for the TIN (Triangulated Irregular Network) to be built.
 - Fill Holes: Click Fill Holes
 . The software auto-fills mesh holes to obtain a complete enclosed model.
 - Modify Density (Optional): Adjust if weight calculation is not needed.
- Calculate: Click Calculate, select the
XXX_tinflXXXX.plyfile, and view the volume and surface area data. - Export Report: Click Export Report, then select the save path and filename.
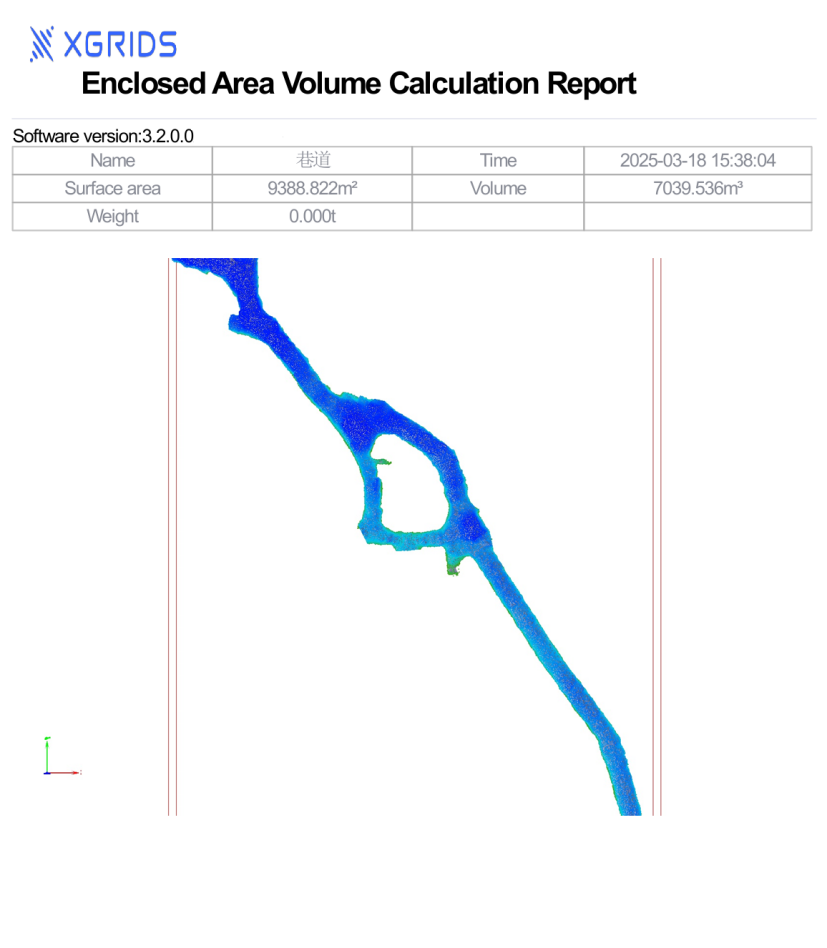
- Exit: Click Enclosed Volume in the menu to exit.
Mesh
One-click textured 3D mesh generation from L1/L2 laser point clouds with external panoramic camera data, and from K1/K2/L2 Pro point clouds with onboard panoramic camera data.
- Click Mesh.
- Input the scanned result data folder (after panoramic coloring).
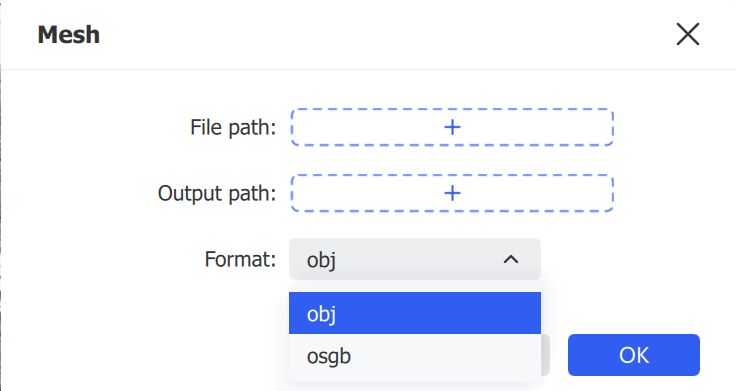
- Choose the export path and format (
.objor.osgb). - The software generates the textured 3D model.
Note: This version supports K1, K2, and L2 Pro result data with onboard colorization and panoramic photo output. It only processes post-processed
.lasresults under 50 GB.