
FAQ
1. When should a user use Model Editor?
- Model Editor is an editing tool for 3D Gaussian models. It supports selection, cropping, separation, cloning, and color adjustment. Users can take model A exported from LCC Studio, edit it in Model Editor, and export a new model B. If model B needs to have Mesh (FBX/OBJ/GLB) assets overlaid or needs to be published, use Scene Editor. Note that assets cannot be published online — projects containing assets can currently only be exported and then shared.
2. How do I rotate the model to another side while cropping?
- The camera view is locked when the selection tool is active. Hold Alt + left mouse button to temporarily change the view and rotate to a different angle. You can also switch to Pivot Mode after cropping to quickly rotate the scene.
3. What is the Depth option used for?
- It controls the penetration distance of the selection area. The deeper the depth, the farther the selection area penetrates.
4. Can the gaps left after LCC model cropping be repaired?
- If there is similar texture nearby, you can use Model Editor to perform the repair. It is recommended to first adjust the model viewing angle when cropping, select an appropriate cropping boundary, and try to perform cuts in areas where the texture is smooth or inconspicuous.
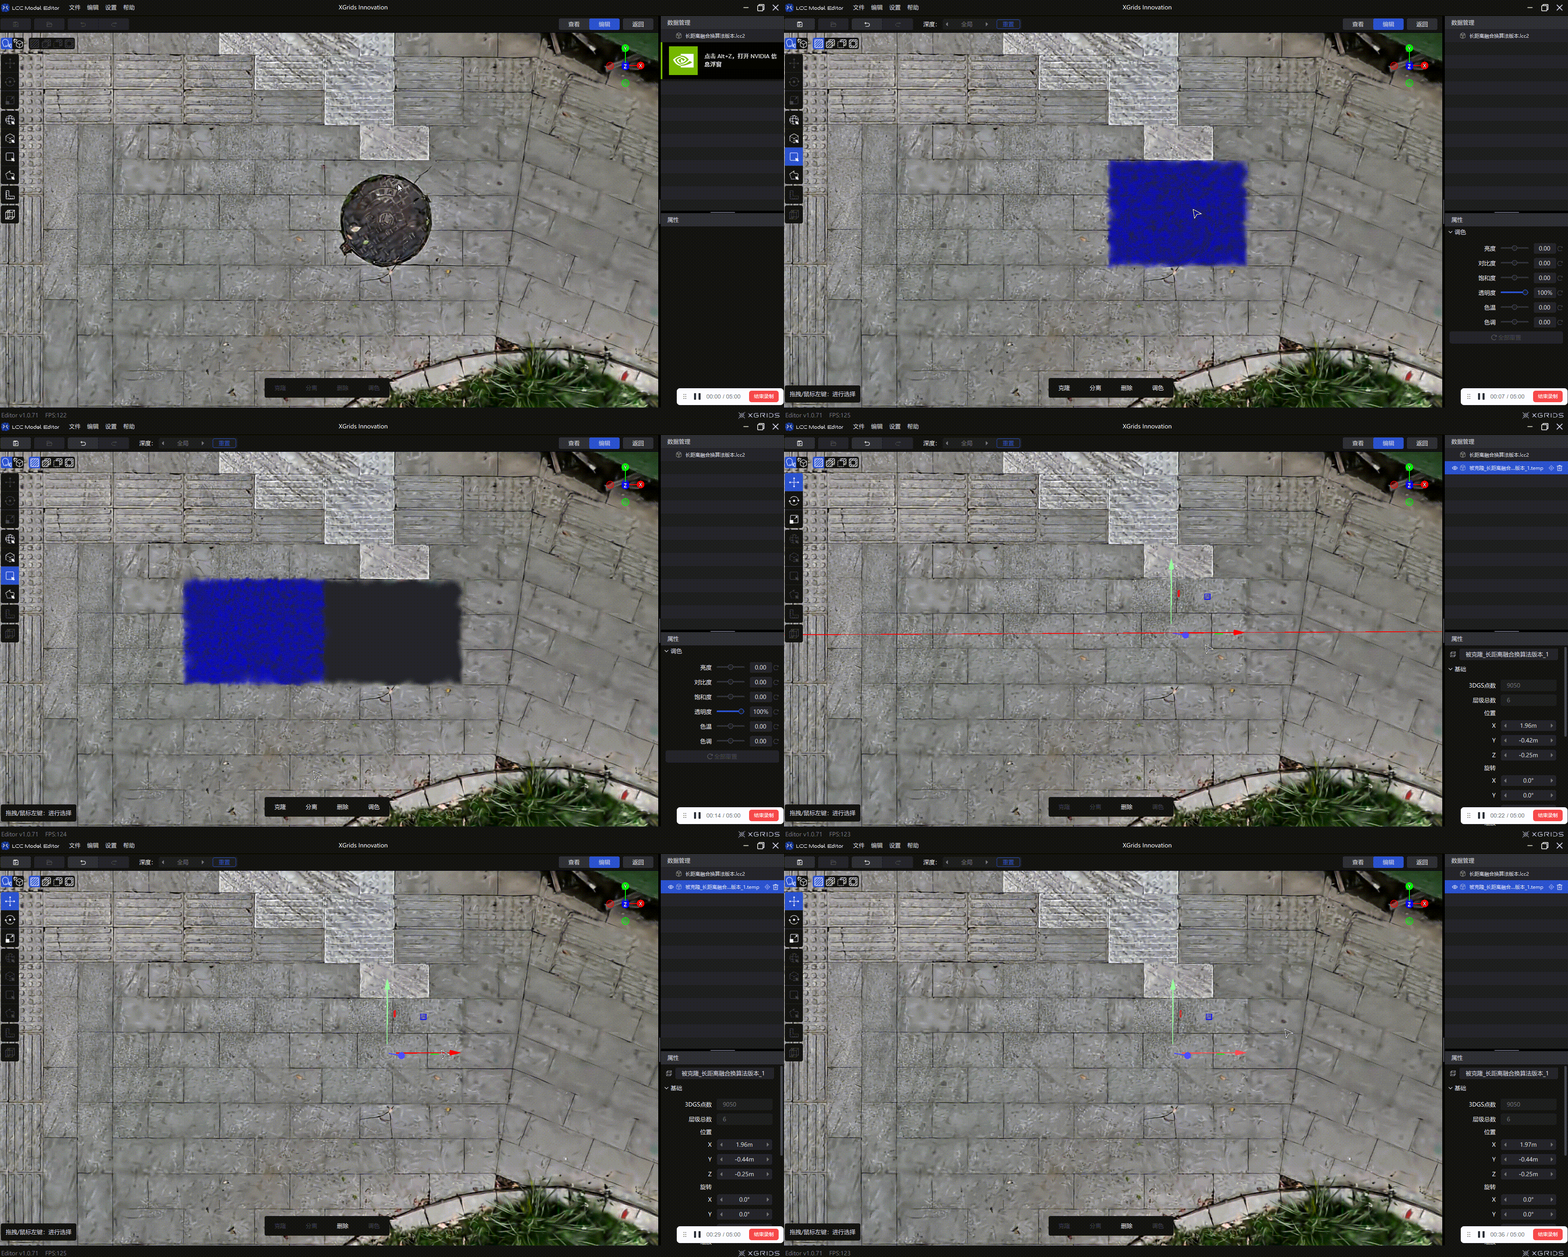
Cropping repair demonstration
5. Why is the exported LCC2 model in its original pre-edit state?
Users report that after importing an LCC model into Model Editor for cropping edits and exporting in LCC2 format, the exported model is still in the original pre-cropping state.
Solutions:
- Confirm the cropping operation was properly saved (File → Save/Save As)
- Before exporting, confirm the current view displays the post-cropping result.
- Use "File → Save As" to save the cropped model as an .lcc2 file.
- If the issue persists, it may be a version bug — update to the latest version of Model Editor.
- Note: Starting from Model Editor v1.0.72, opening older .lcc files will automatically upgrade and convert them to LCC2 format.