
Before Reconstruction
Data Capture
Before using LCC Studio for 3D spatial reconstruction, you must first use an XGRIDS scanner to comprehensively scan the space.
Important
Because LCC Studio includes Map Fusion and Aerial-Ground Fusion, data capture is subject to specific requirements. When scanning, strictly follow the capture guide to ensure that your data meets the requirements. RTK data capture also has additional considerations to ensure scan-data quality and suitability. Refer to the relevant capture guide and quick start guide for detailed instructions.
- 📖 Capture Guide: LCC Capture Guide
- 🎬 LCC Quick Start Guide video: LCC Quick Start Guide.mp4
LCC Data Features Supporting Absolute Coordinate Information: LCC files generated from data captured using RTK devices now support absolute coordinate information, with CGCS2000 and WGS84 as the two default mainstream coordinate systems. You can use these files in geographic information platforms (such as Cesium) for 3D visualization. Developers can sign in to the XGRIDS Developer Platform and consult the Web SDK developer documentation for detailed procedures and integration guidance.
- 🔗 XGRIDS Developer Platform: https://developer.xgrids.com/
Upload Capture Data
Click Create to enter the data reconstruction page. Depending on your reconstruction needs, select Single Model, Map Fusion, Aerial-Ground Fusion, Aerial Reconstruction, or another reconstruction type. Then upload capture data by following the interface workflow.
You can upload capture data from local storage or use external USB drive mode to read the original capture files directly.
Important
When using USB drive mode to upload capture data, you can only read data from local storage devices, including internal hard drives, SSDs, USB drives, and removable storage devices connected through USB. Reading directly from network storage, such as OneDrive or NAS, is not supported.
Tip
Before using LCC Studio for data reconstruction, we recommend that you first set the project storage path and capture data backup path. Keep the LCC data storage location separate from the software installation directory. We recommend setting the storage path to a solid-state drive (SSD), which can significantly improve data generation and processing efficiency.
- Set the LCC project path: Settings - General - Project Path - Select Directory
- Set the capture data backup path: Settings - General - Capture Data Backup Path - Select Directory
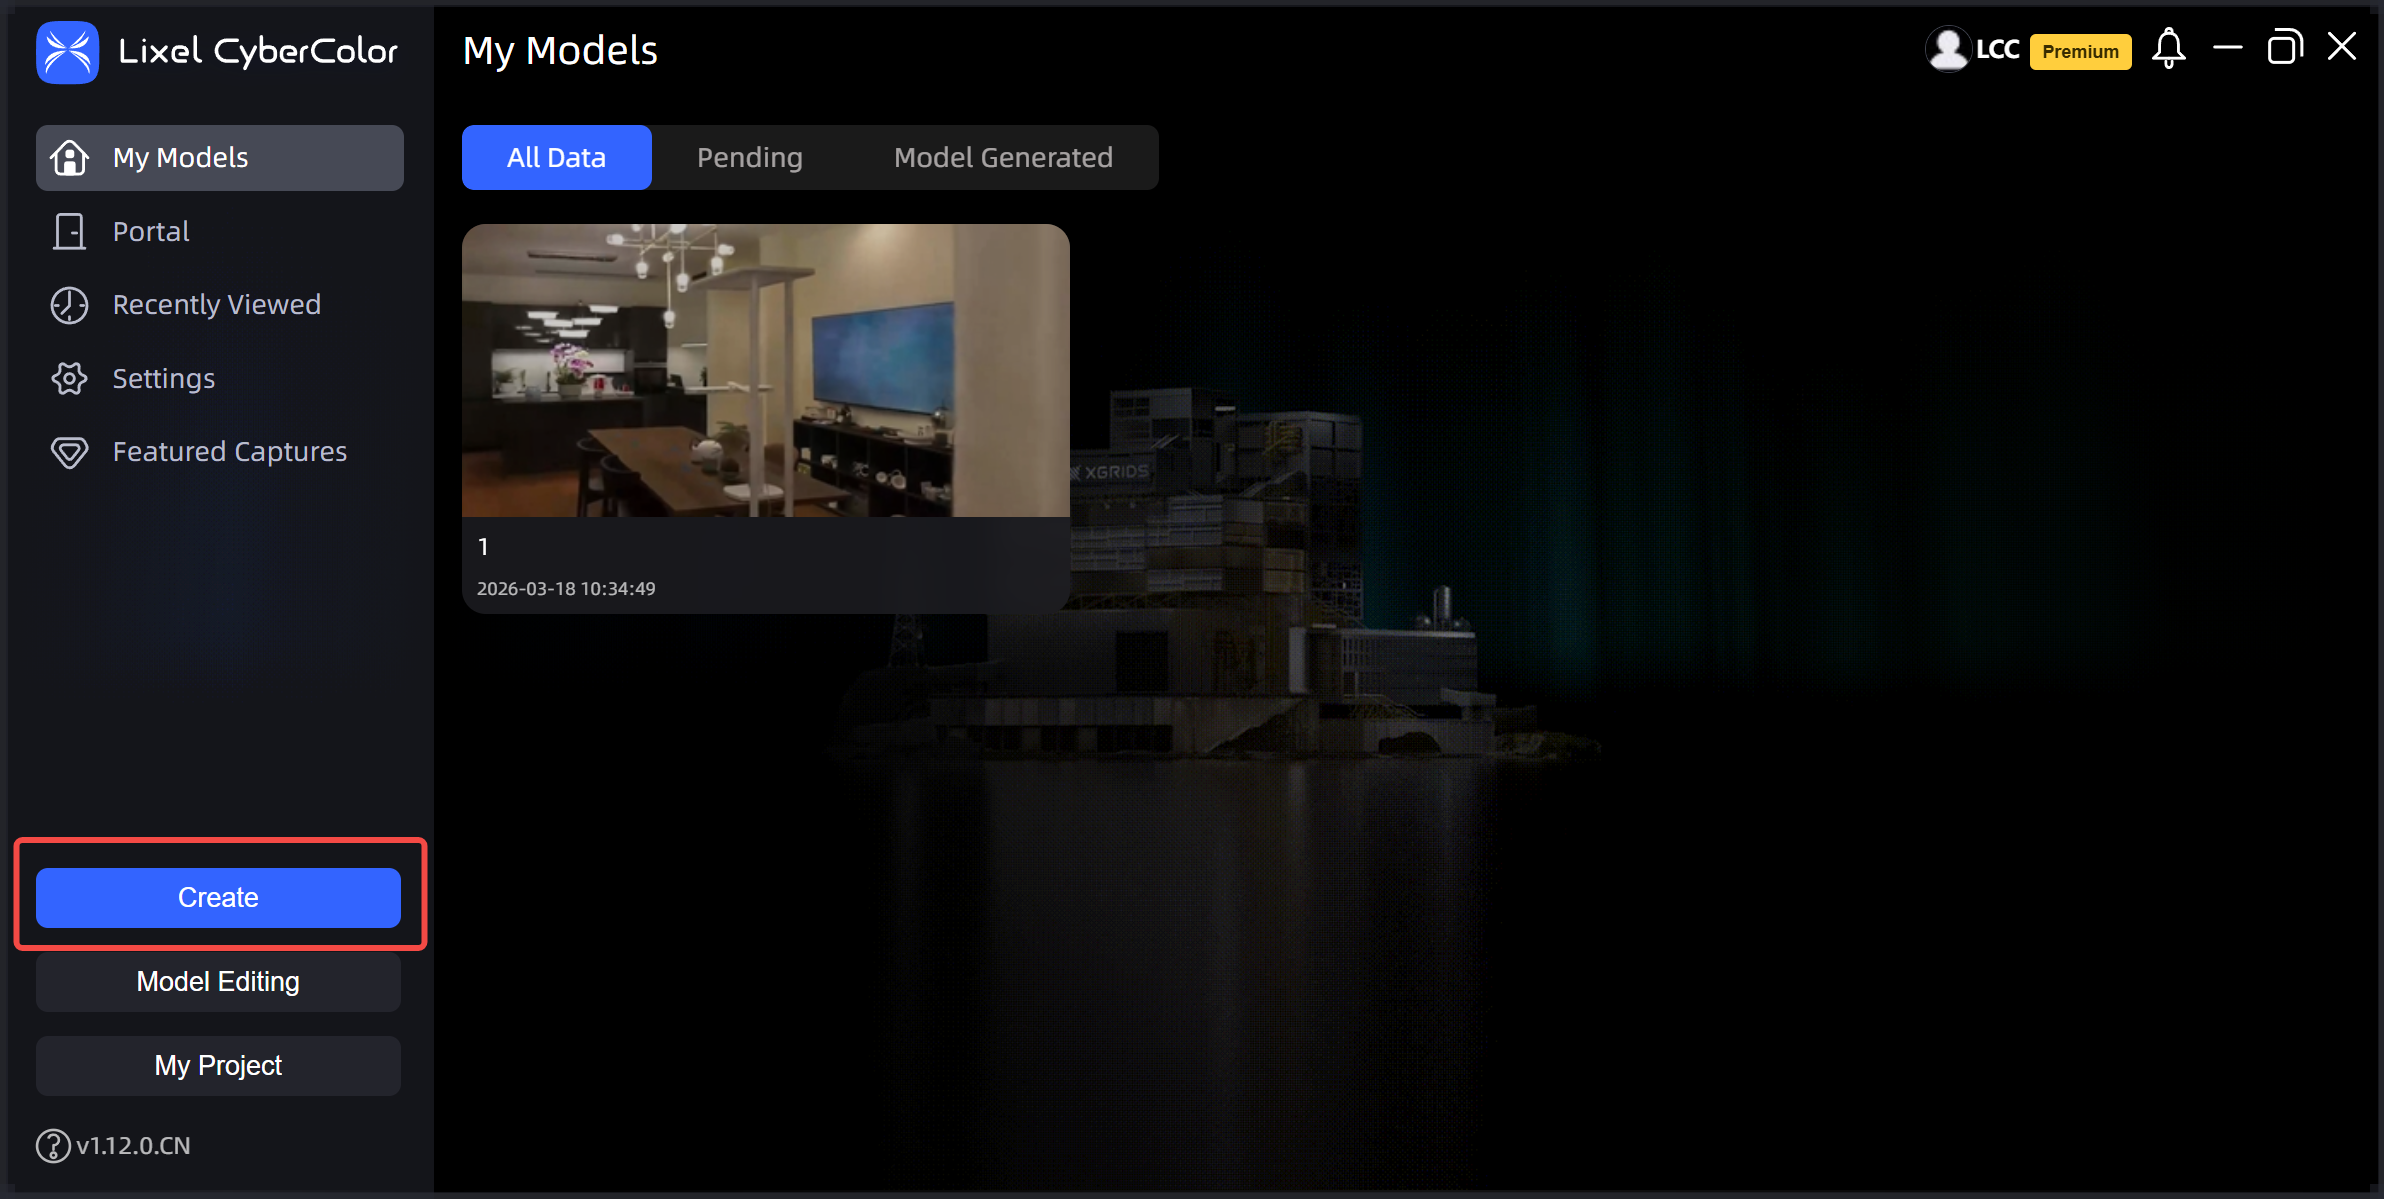
Create
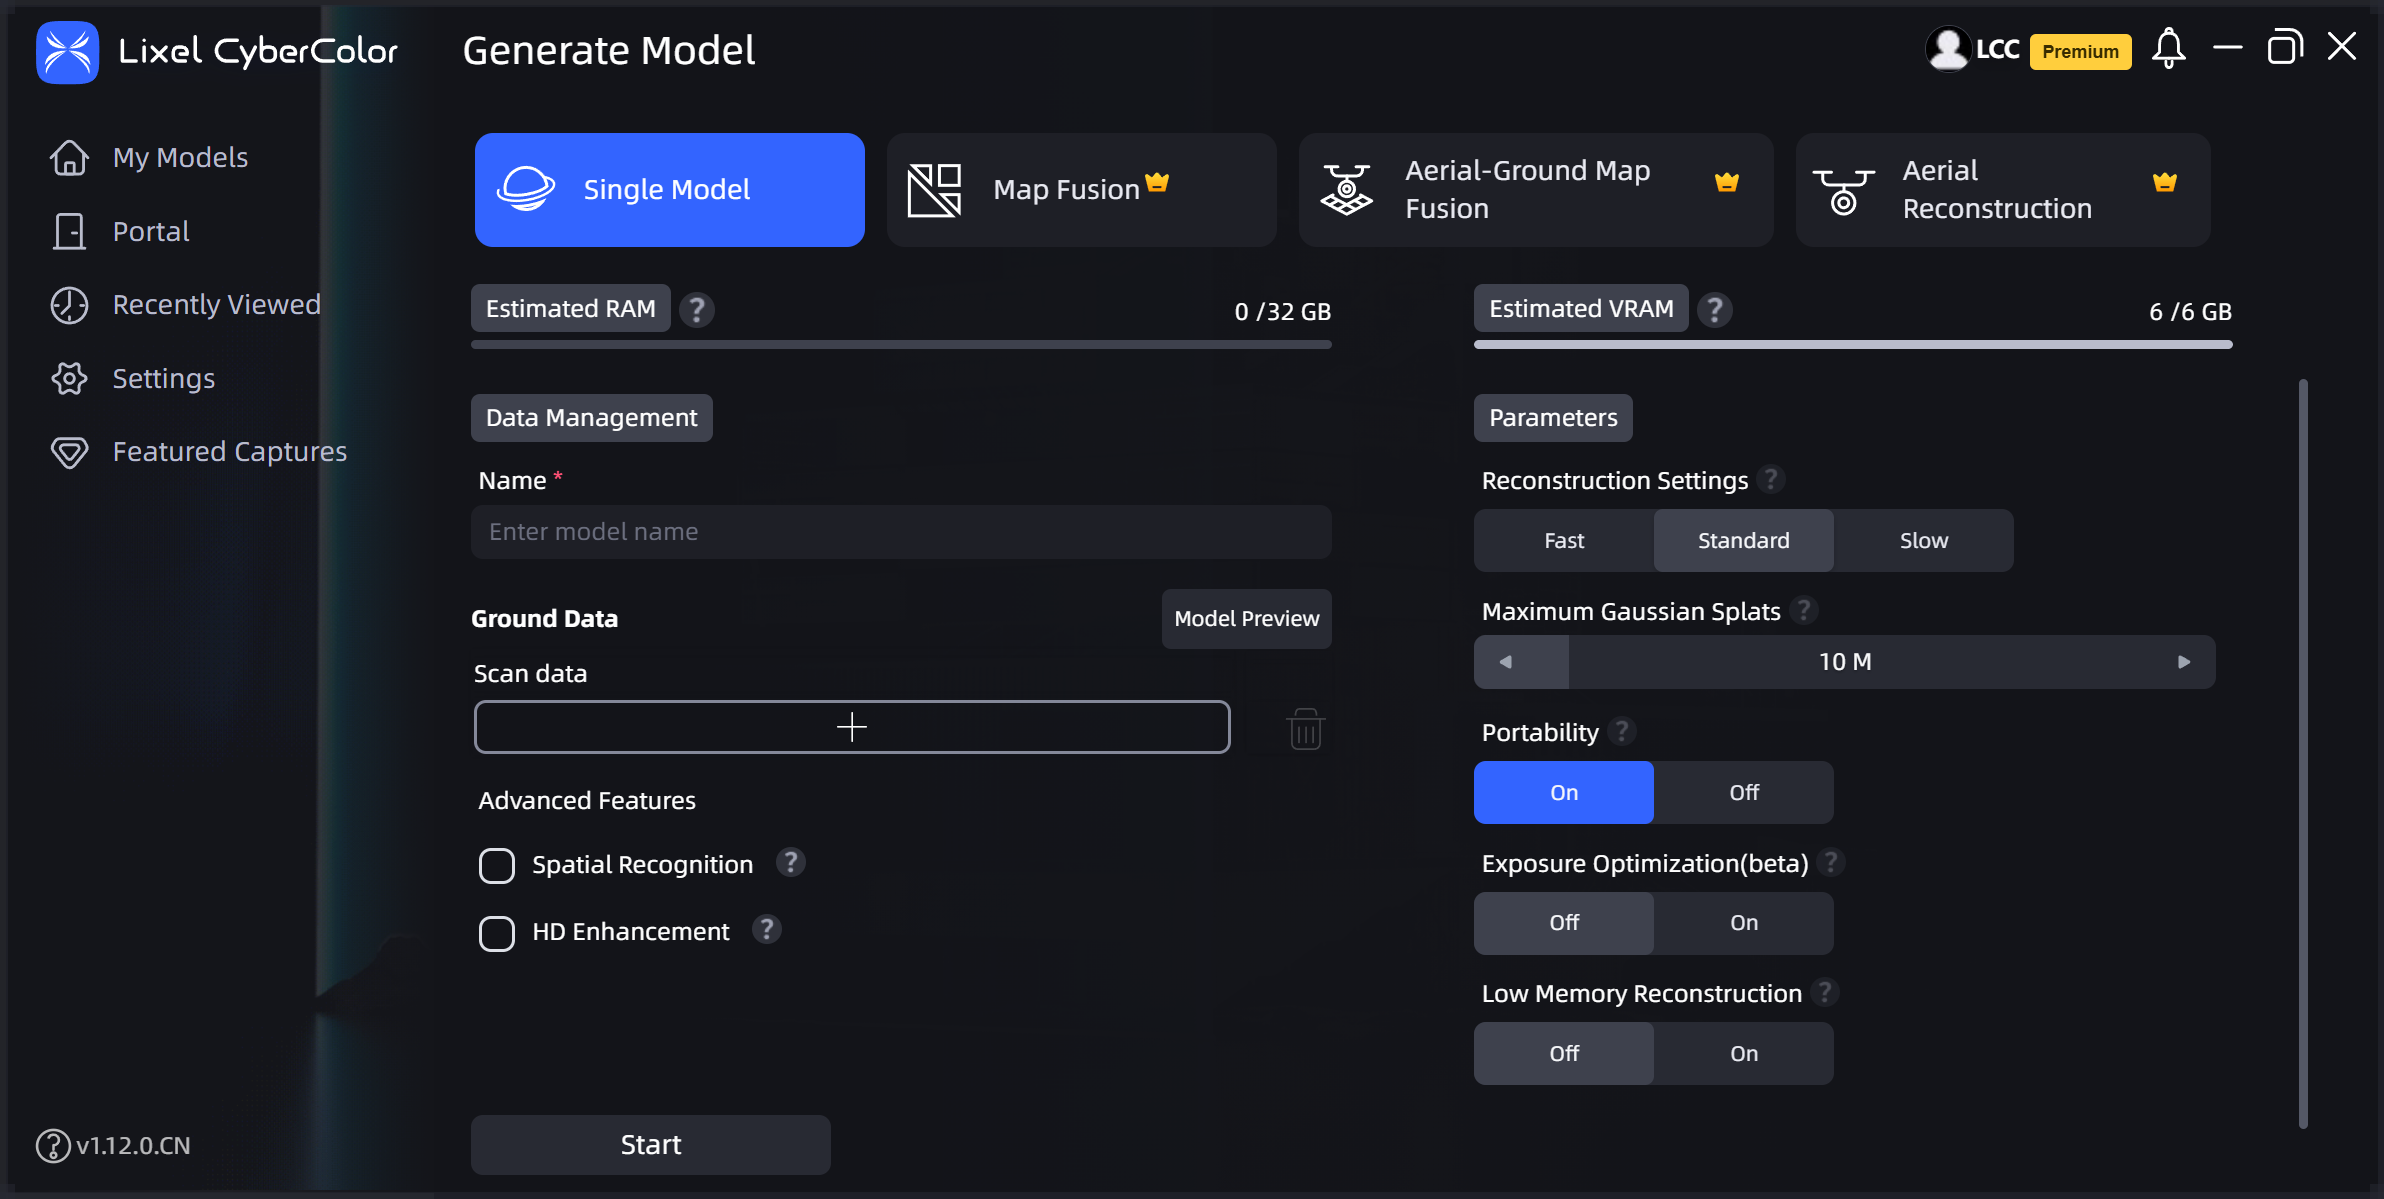
Reconstruction type selection
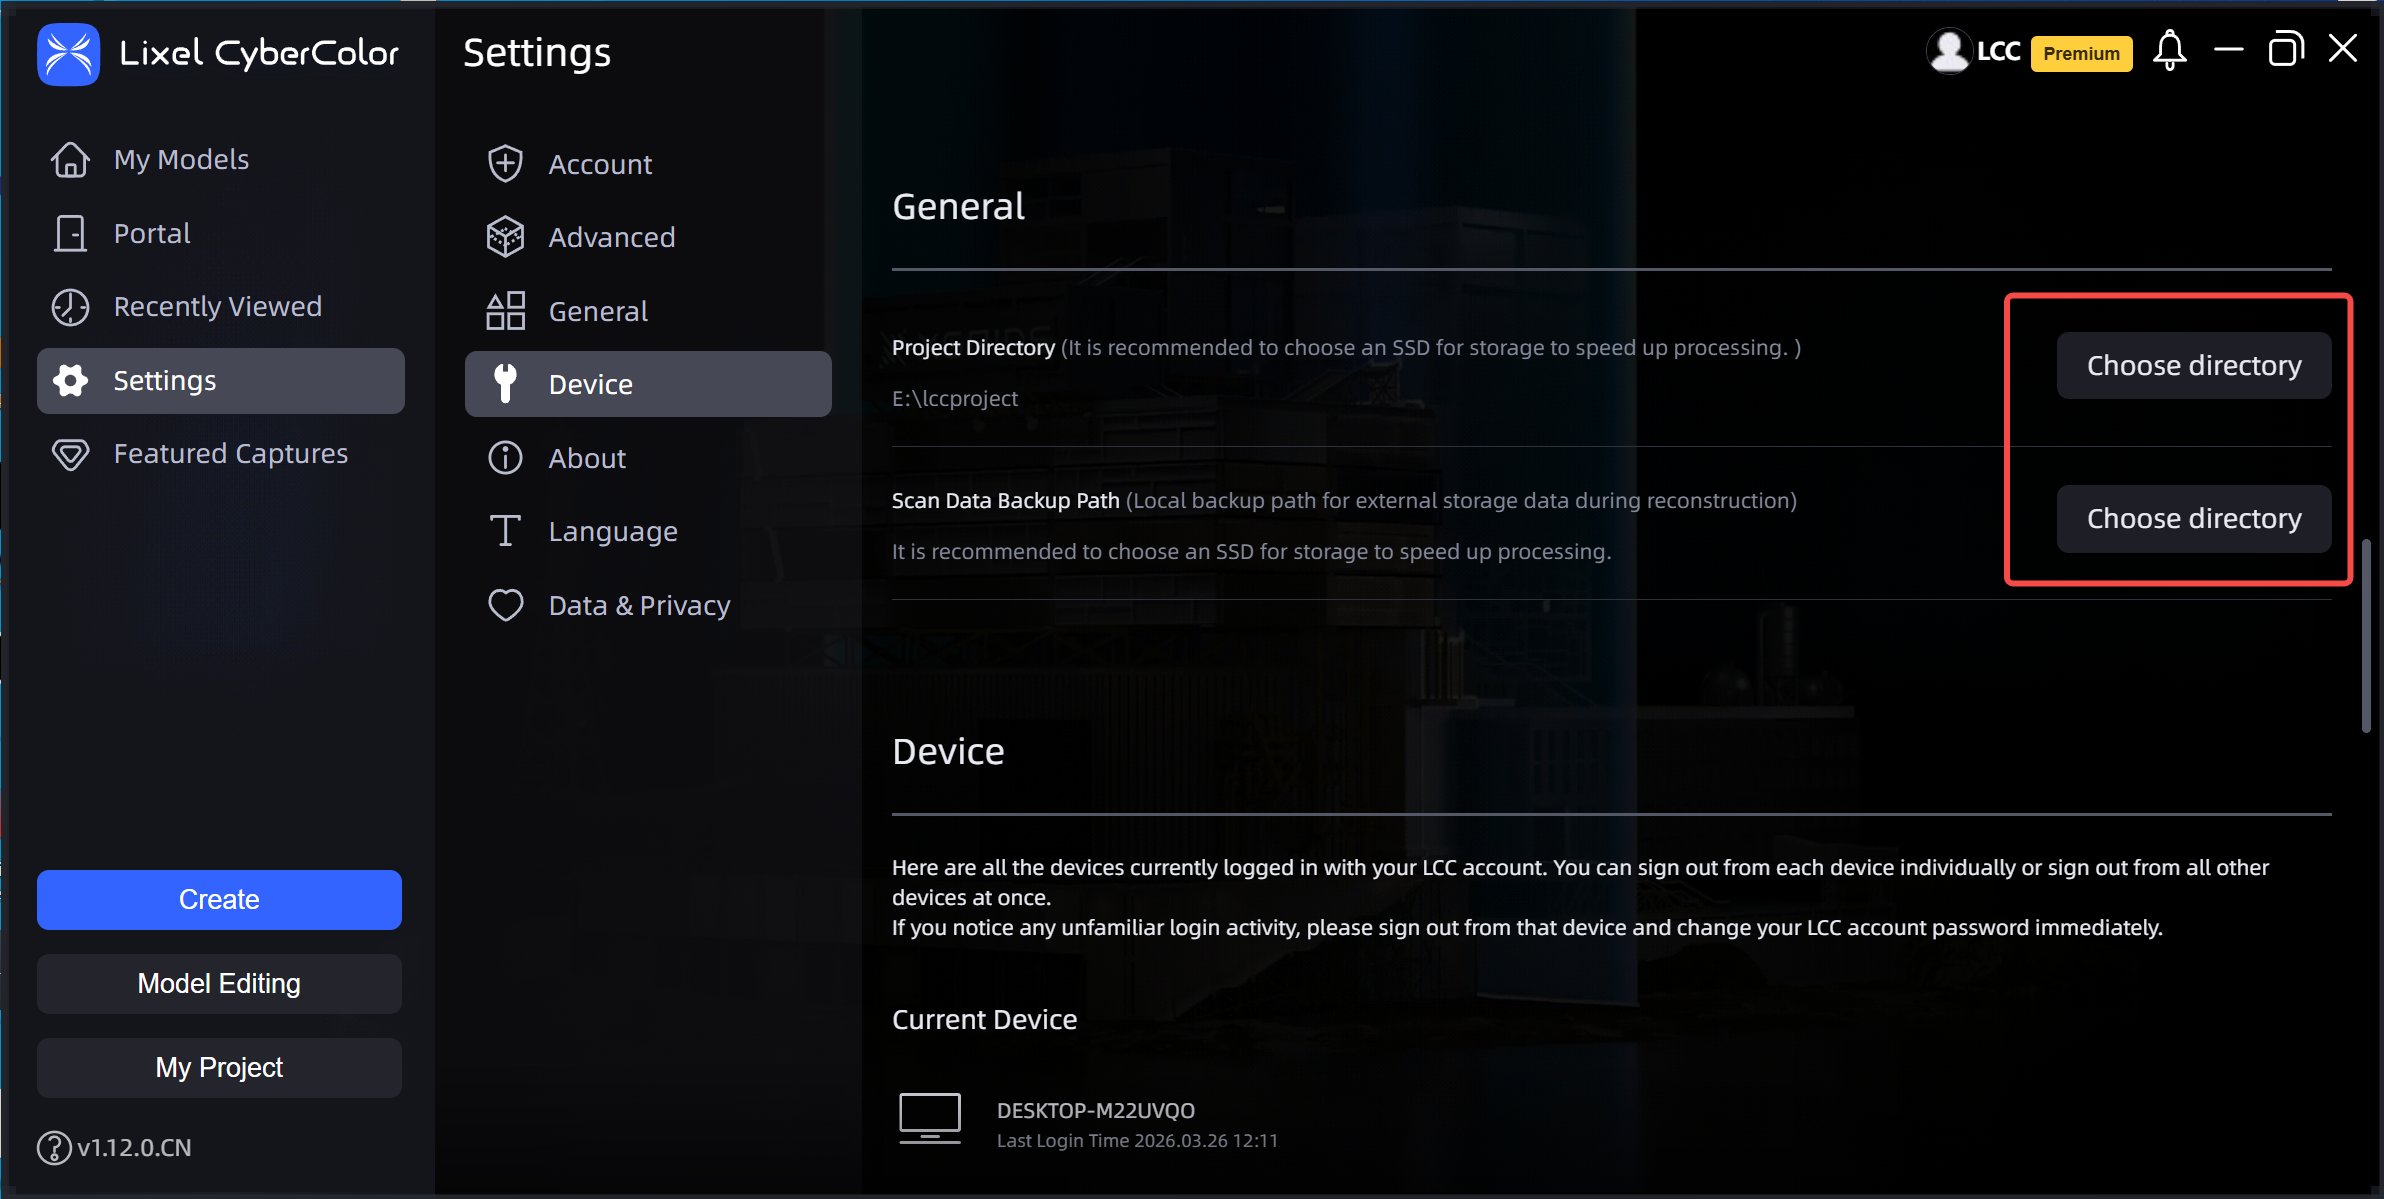
Set the LCC project path
Automatically Read Device Files
In addition to the upload methods above, LCC Studio v1.13.0 added automatic device file reading. When you connect an XGRIDS scanner to your computer through USB, the system automatically detects and reads project information, simplifying the data import workflow.
Procedure
- Connect the XGRIDS device to your computer through USB.
- When the system automatically detects the device, a notification appears in the lower-right corner of the screen. Click it to open the device dialog.
- In the device dialog, you can view the following information:
- Device model and serial number
- List of importable projects, including project name, file size, and capture date
- Imported projects are displayed in gray and cannot be imported again
- Select the reconstruction method.
Important
Automatic device file reading currently supports only quick import and reconstruction of a single scene.
- Set the file storage path (the default is the capture data backup path).
- Click Reconstruct Now. The project is added directly to the reconstruction queue.
Disable Automatic Detection
Automatic detection is enabled by default. If you do not need automatic detection, you can turn it off in Settings:
- Go to Settings - General.
- Find the Device option.
- Click to turn off automatic device detection.