
My Models
This area contains all LCC model data you have created and uploaded, including data pending reconstruction and generated data. Here, you can view, edit, and manage your personal models.
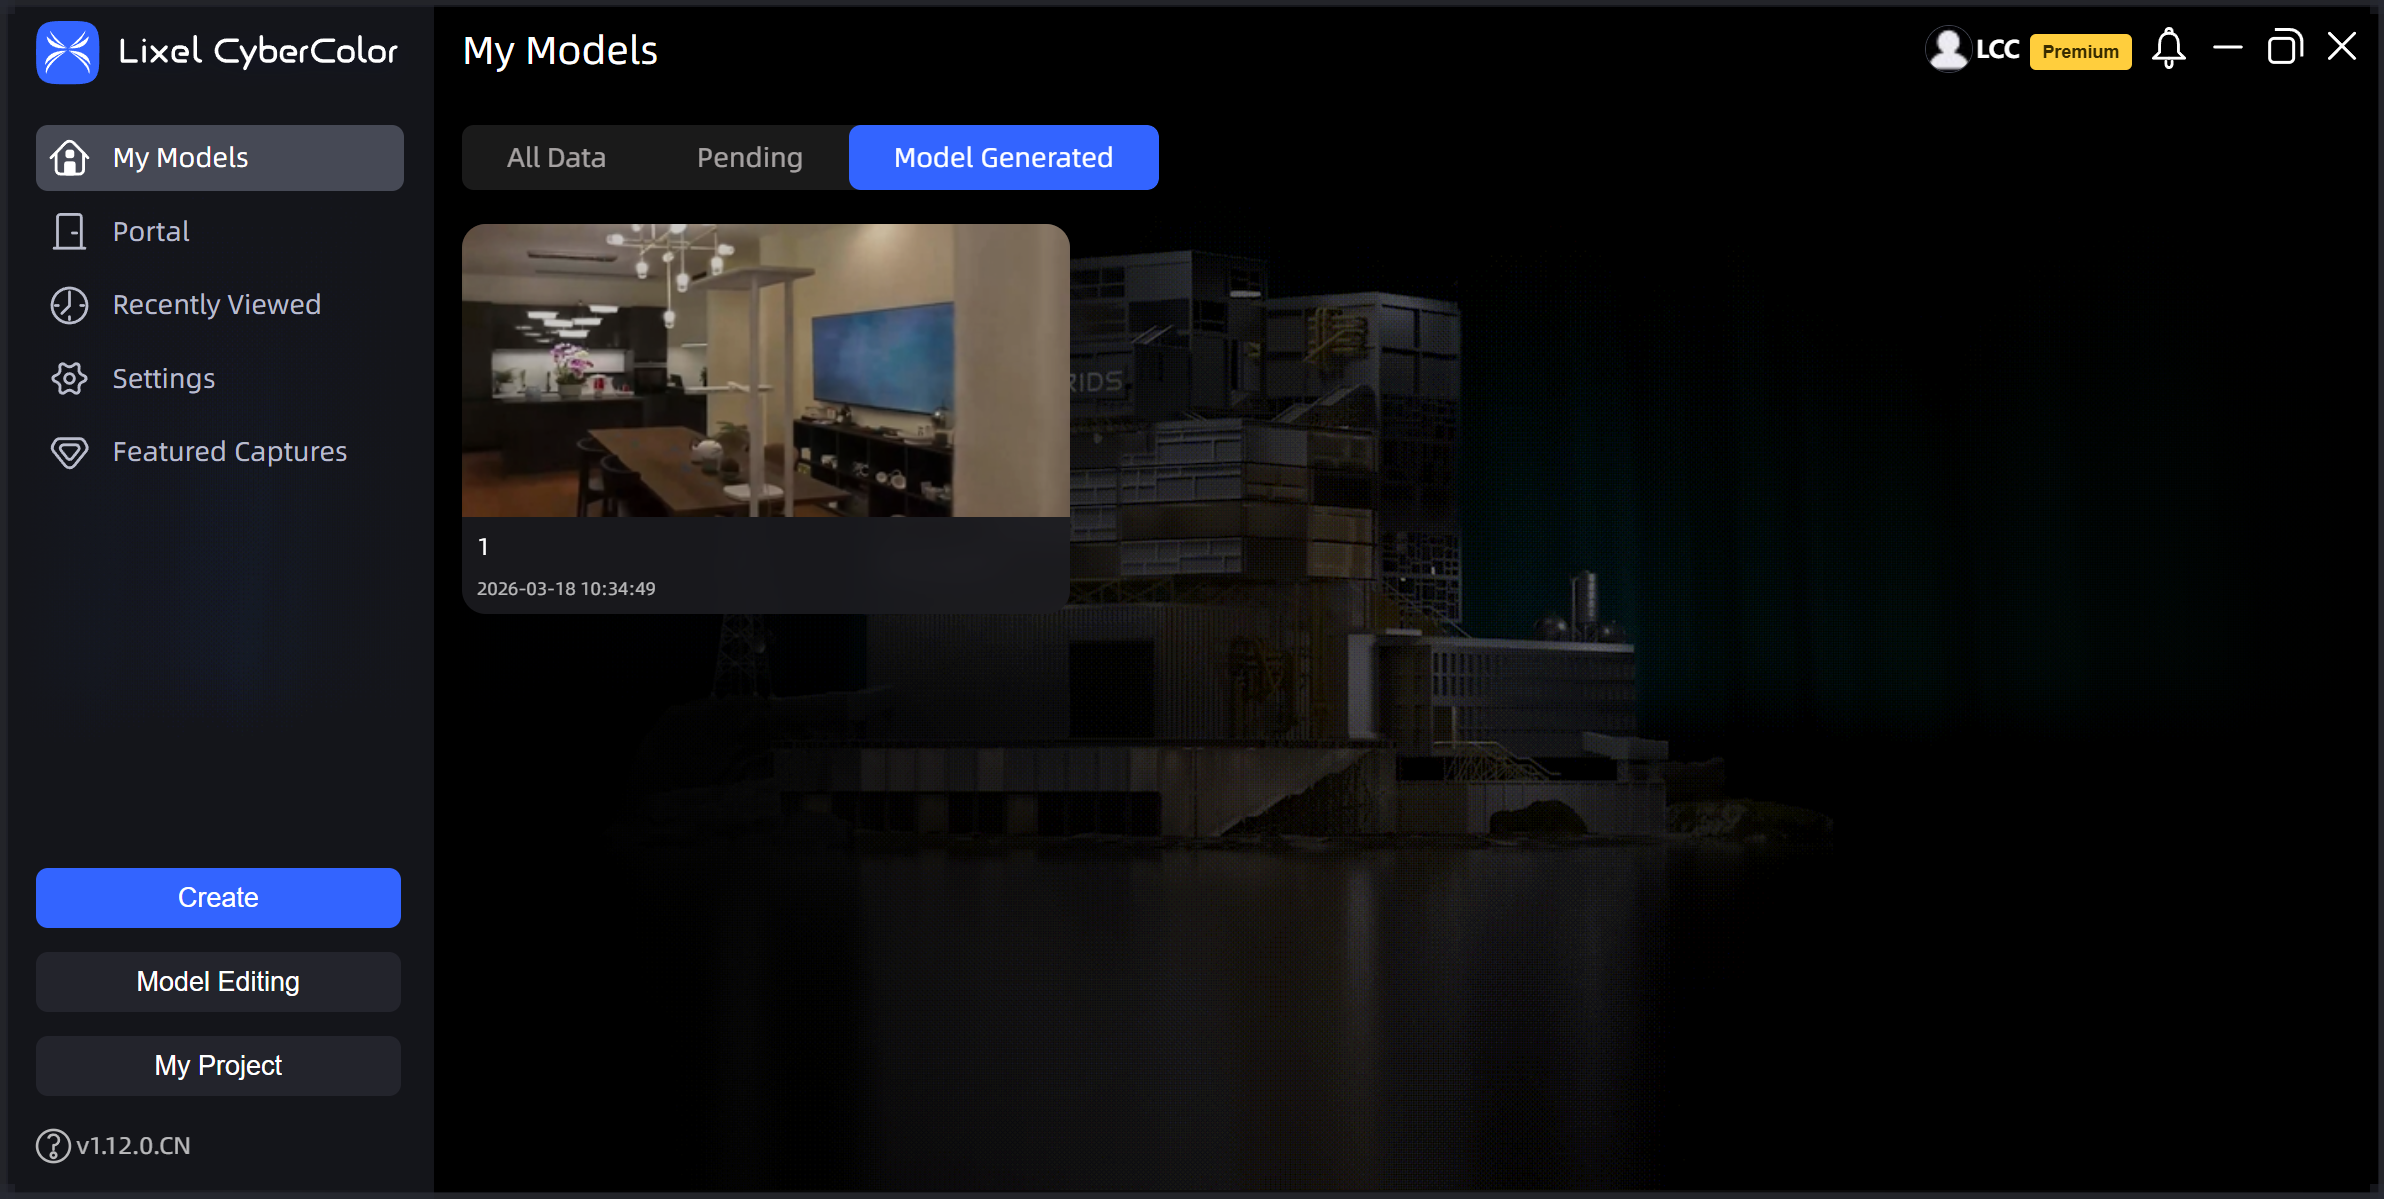
My Models
Model Reconstruction and Editing
- Generate Now: Click the "Generate Now" button to start the LCC model reconstruction workflow.
- Model Editing: You can import exported
.lccmodel files and.plyfiles into LCC Scene Editor to edit models.
LCC Model Management
LCC data management includes three data categories:
- All Data: Includes all valid data categories and all dynamic statuses, such as data being reconstructed, exported, published, or paused.
- To Be Reconstructed: Includes locally failed reconstructions, data pending reconstruction, data currently being reconstructed, and paused reconstructions.
- Generated: Includes all data for which reconstruction was successful.
Note: In the Generated list, you can double-click to enter the Edit space and directly edit or modify a completed model. You can also click View to enter the View space and view the model.
Model Settings
Each model card has a ... menu in its upper-right corner. Click this menu to access functions for different data states in My Models.
- Data being reconstructed: Change Cover, Cancel Reconstruction, Pause, Upload Error Logs
- Generated data: Change Cover, Publish, Publish Management, Open File Location, View, Export, Report, Upload Error Logs, Delete
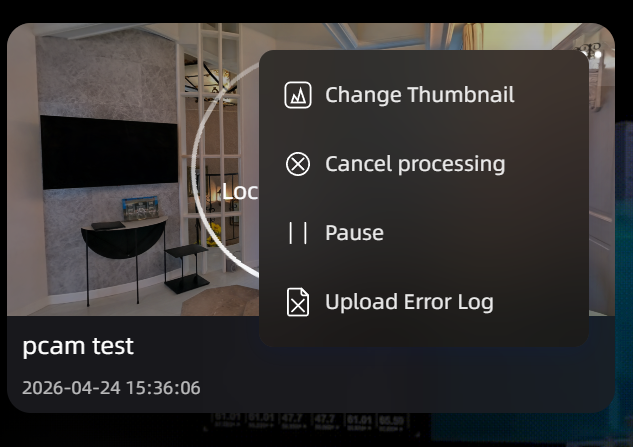
Being reconstructed
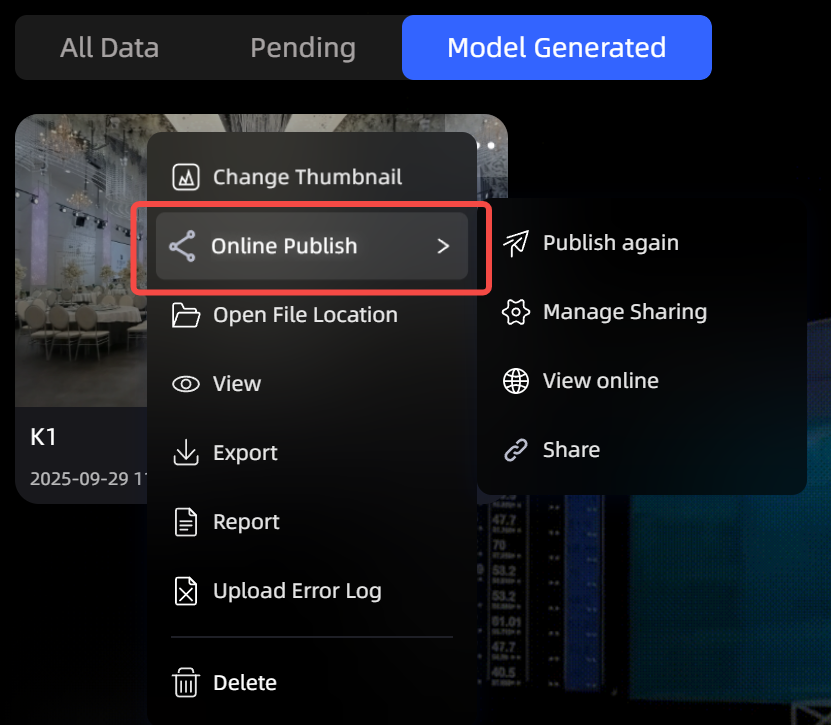
Generated
Change Cover
You can customize a card cover and change the cover image at any stage of a reconstruction task.
Replacement-image requirements:
- Format: JPEG / JPG / PNG only
- Size: ≤ 5 MB
Publish
The LCC model publishing feature lets you share created models with other users or groups. You can choose password-free or password-protected sharing to protect model-content privacy as needed.
- Password-Free Sharing: Allows anyone with the link to access the model without a password or other verification.
- Password-Protected Sharing: Protects the model with a password, allowing access only to users who have the password. The password can be customized, or the system can generate a strong password to increase security.
- Model Description (Optional): Add a brief description of the model's content, purpose, or other relevant information to make it easier to reference and understand during cloud publishing management.
- Create and Share Link: After you click Create, the system automatically generates a model link that you can copy directly to share.
Publish Management
Click Publish Management to go to the cloud publishing-data management page, where you can view the publishing links and publishing details for all models and make further changes to published link information.
Republish
For published models, you can make further changes to the publishing link. These changes include:
- Link Parameters: Change the URL suffix of the model link.
- Sharing Permissions: Adjust the sharing link's permission settings to control password-protected or password-free access to the model.
- Access Password: Set or change the model's access password.
- Model Description: Modify the model's description to give visitors a clearer model background and explanation.
Cloud Publishing Management
Manage whether links are published or unpublished. You can sign in to the developer platform and manage the accessibility of publishing links by clicking Publish or Unpublish to control whether a link is externally accessible.
View Online
You can access and view published models online.
Share
Click Share to quickly copy the link and access password.
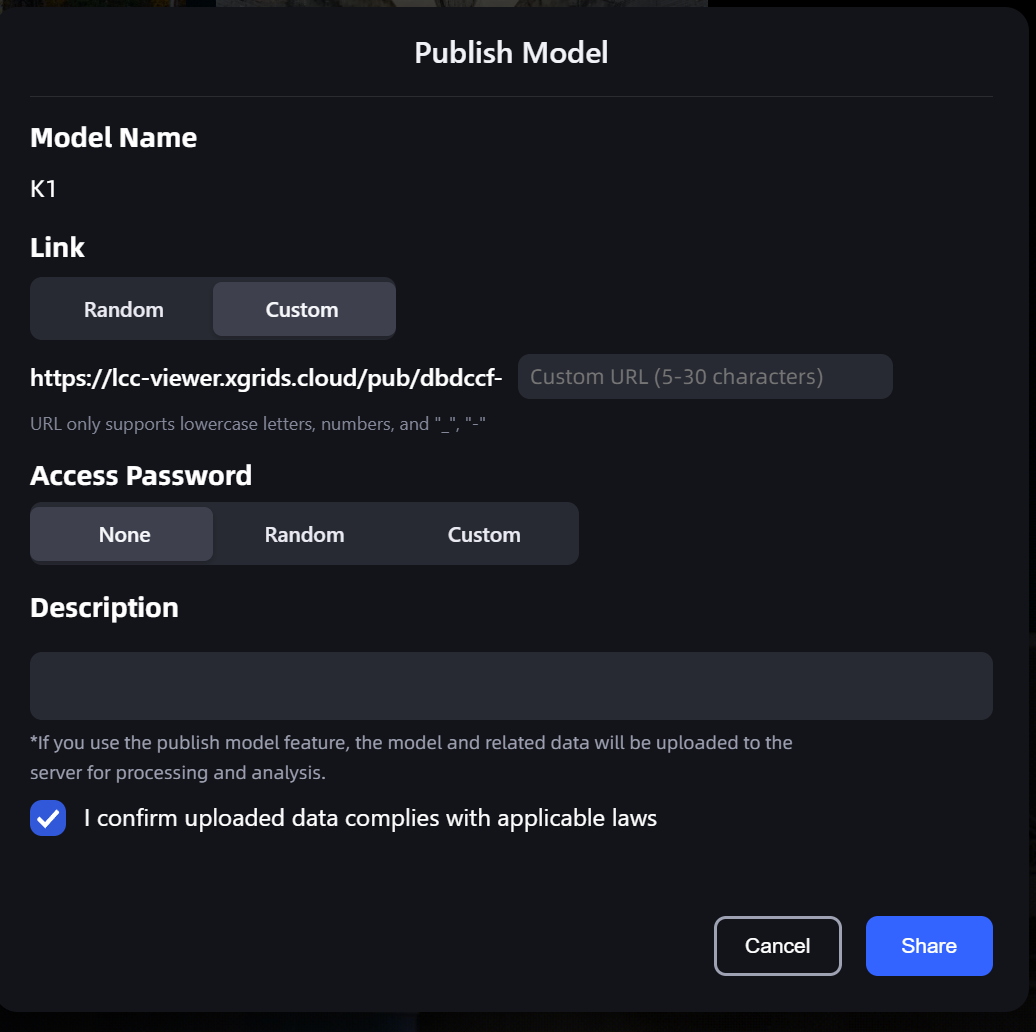
Publish
Open File Location
Quickly locate the model file.
View
Open the model in view mode.
Export
LCC Studio supports exporting models as different 3DGS data formats, including .lcc data-result files, .lcc2 data-result files, .ply data files, .usd format, and 3D Tiles format.
In the export dialog, selecting .usd format includes USD and USDZ options:
- USD (Recommended): Based on 3DGRUT; supports Omniverse Kit 110.0+ and ray tracing.
- USDZ (Forward Compatible): Based on 3DGUT; supports Omniverse Kit 107.3+ and does not support ray tracing.
File Format Descriptions
- .lcc format: Exports a collection of files that includes
.lccfiles. When exporting, create a new folder to store these files and rename the folder. Compared with traditional formats, LCC files are compressed by 70%–90%, making them easier to store, view, and use. They can be used with XGRIDS' Unity or Unreal Engine developer toolkits for further development in these mainstream engines. When exporting LCC, you can also export Mesh files. A Mesh file is a triangle-mesh model file exported with an LCC asset and is widely used in 3D modeling and rendering. Currently, Mesh files do not contain texture information and support only.objand.plyformats. - .lcc2 format: A newly introduced next-generation
.lccdata format..lcc2offers smaller file sizes, a smoother rendering workflow, and faster model loading. - .ply format: A conventional point-cloud file format suitable for other open-source 3D Gaussian viewers. It can be imported and processed through other 3D Gaussian plugins in the UE or Unity ecosystem. You can export PLY files at different precision levels or export all PLY files.
- USD format: USD format is exported using the NVIDIA 3DGRUT toolchain and supports ray-traced rendering of Gaussian point clouds. It supports NVIDIA Omniverse Kit 110.0+ and Isaac Sim 5.0+. Note: USD is a format dedicated to NVIDIA Omniverse and uses a custom extension of the UsdVolVolume Schema. It cannot be rendered in general 3D software such as Blender, Maya, Houdini, or Cinema 4D, and is supported only in NVIDIA Omniverse and Isaac Sim. For general compatibility, choose another export format.
- USDZ format: USDZ format is exported using the NVIDIA 3DGUT toolchain, uses the NuRec standard, and supports nonlinear camera projection (fisheye lenses / rolling shutter). It supports NVIDIA Omniverse Kit 107.3+. Note: USD format is recommended for better rendering results and cross-platform compatibility. USDZ is the forward-compatible version and does not support ray tracing. USDZ can be exported only when: ① the firmware version is ≥ 3.0; and ② the reconstruction type is Single Model.
- 3D Tiles format: 3D Tiles is a three-dimensional tiled-data format for WebGIS and digital twins. Exported 3D Tiles data complies with the OGC 3D Tiles 1.1 standard and can be loaded directly in Cesium 1.31. LCC Studio reconstruction results can be exported to 3D Tiles in one step for web display. Note: Currently, only Gaussian models with up to 4 million Gaussian points can be converted.
Report
LCC Studio supports viewing a detailed data report for every model generated locally. You can use this feature to obtain detailed information about LCC reconstructed models.
Upload Error Logs
If a space project encounters any issue, you can use this feature to upload logs directly to the LCC team.
Quick Reporting (new in v2.2.0):
In a model card's right-click menu, click Upload Error Logs to quickly submit a report without opening the details page.
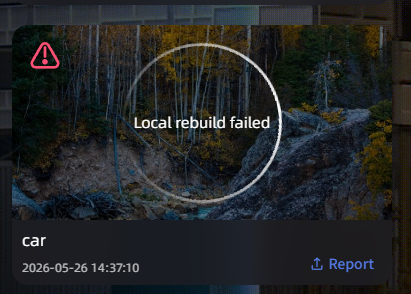
Error log upload progress and status
Tip
- To ensure that an issue can be accurately diagnosed, make sure the log file contains key information from before and after the issue occurred.
- After a successful upload, the LCC team receives a notification and will address the issue as soon as possible. You can view the status of historical tickets in Settings - Feedback Records.
Export Formats
In the My Models list, right-click a model → Export to select one of the following export formats:
| Format | Description | Use Case |
|---|---|---|
| LCC | Legacy LCC format | Compatible with legacy tools and workflows |
| LCC2 | Next-generation format with SOG/SPZ compression support | Recommended; small file size and ecosystem compatibility |
| PLY | Universal point-cloud format | Import into third-party tools |
| Mesh | Mesh model | 3D modeling software |
| 3D Tiles | GIS tile format | GIS platforms such as Cesium and ArcGIS |
| USD | NVIDIA Omniverse format | Omniverse ecosystem |
Export LCC2 Format
LCC2 is a next-generation 3DGS data format. Compared with the legacy LCC format, its file size is greatly reduced (SOG compression reduces it by 8–26×) while it supports direct loading in mainstream 3DGS ecosystem platforms (such as SuperSplat and Arrival.Space).
Export Steps
- In the My Models list, right-click a model → select Export.
- In the export dialog, select LCC2 from the File Format dropdown.
- Select a compression format:
- SOG (Recommended): Smaller file size (8–26× reduction); the default format for the LCC ecosystem.
- SPZ: A format compatible with the Niantic/Scaniverse ecosystem (approximately 10× reduction).
- Select additional options as needed:
- Include Mesh: Includes collision data in the export.
- Intelligent Space Recognition results: Includes space-recognition data in the export (this feature must have been enabled).
- Select a save location, then click Confirm to start the export.
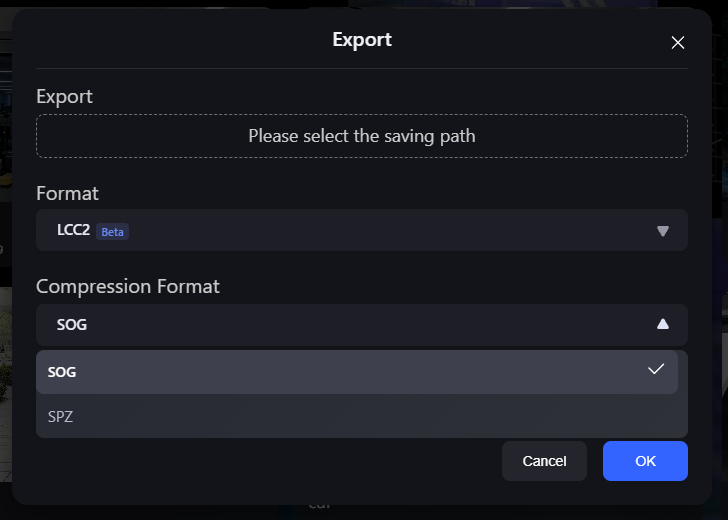
LCC2 export dialog (SOG/SPZ compression-format selection)
Note: Hover over the ? icon beside the compression format to see a detailed comparison of the SOG and SPZ formats. Each LCC2 file uses only one compression format; the two formats are not mixed.
Convert Legacy Formats
If you have a model in the legacy LCC format, you can convert it to LCC2:
- In the My Models list, right-click the legacy LCC model.
- Select Convert to LCC2.
- Wait for the conversion to complete (the dialog displays progress).
- After a successful conversion, all subsequent operations use the new format.
Note: Conversion to LCC2 is a one-way upgrade. After conversion, you cannot revert to the legacy LCC format. Legacy LCC models can still be opened and viewed normally.
Export 3D Tiles
Export a reconstructed model in 3D Tiles format to load and view it directly in GIS platforms such as Cesium and ArcGIS, without secondary conversion.
Export Steps
- In the My Models list, right-click a model → select Export → select 3D Tiles.
- In the export dialog, select a version:
- 3D Tiles v2 (Recommended): Uses SPZ v2 compression for smaller files and requires Cesium 1.31 or later.
- 3D Tiles v1 (Legacy): Compatible with legacy systems running Cesium 1.20–1.30.
- Select a save location, then click Confirm to start the export.
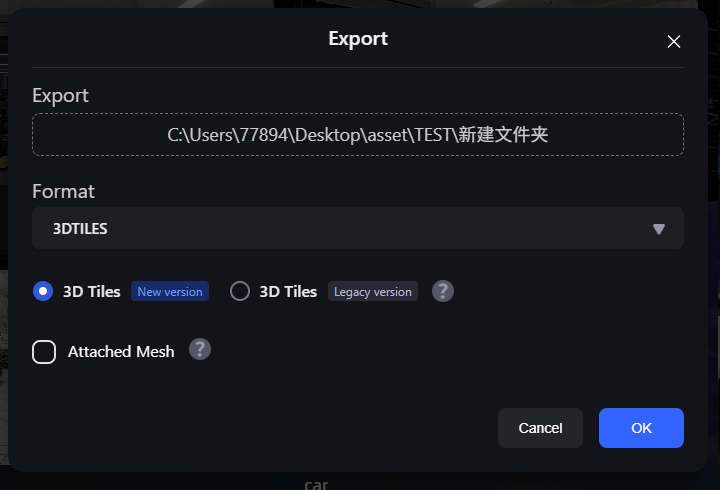
3D Tiles export dialog (v2 recommended / v1 legacy)
After the export is complete, the save directory contains a tileset.json entry file and multiple .glb tile files. Deploy the entire directory to Cesium to load it.
Note: If your GIS platform uses a Cesium version lower than 1.31, select v1 (Legacy). When v1 is selected, an orange prompt is displayed. We recommend upgrading Cesium and using the recommended version for a better compression ratio and rendering result.