
Global Toolbar
The global toolbar is located in the upper-right area of the 3D viewport and provides quick access to scene display options and common functions.
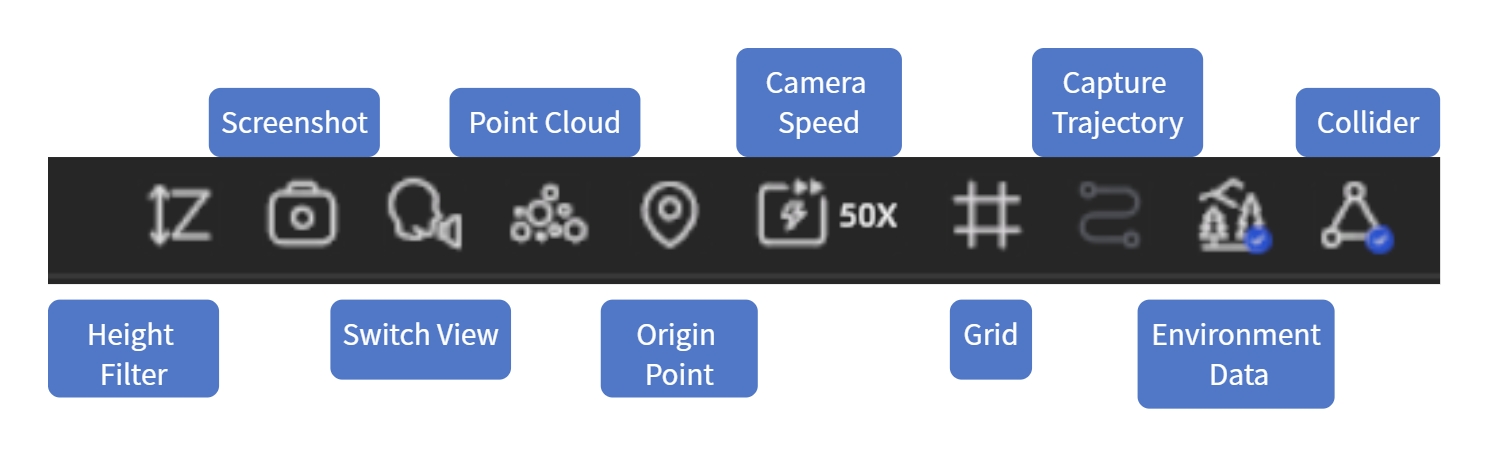
Global Toolbar
Undo / Redo
The toolbar provides Undo and Redo buttons:
- Active state: Button is enabled; click to undo/redo
- Grayed out: No actions available to undo/redo, or the current mode does not support undo
Shortcuts: Ctrl+Z (Undo), Ctrl+Y / Ctrl+Shift+Z (Redo)
Render Quality (V2.2 Update)
As of V2.2, render settings have been moved to the Settings panel → Rendering group, with Shadow, DLSS, and Rendering Mode (MIP/Non-MIP) added as configurable options. See Settings.
Collision
When enabled, navigating the scene simulates a realistic walking experience — walls, floors, and other objects block movement. When disabled, you can pass through all objects freely.
Environment Data
Show or hide the model's built-in ambient lighting information. When enabled, the scene displays more realistic lighting.
Note: Only one model's environment data can be active at a time. Enabling the skybox automatically disables environment data.
Capture Trajectory
Show or hide the scanning device's capture path, making it easy to see which areas were scanned.
Grid
Display a reference grid at the base of the model to help judge position and scale.
Camera Speed
Adjust how fast you move through the scene. Increase for large scenes; decrease for detailed inspection.
How to adjust:
- Drag the speed slider in the toolbar (range: 1–100)
- Shortcut:
Ctrl+ mouse wheel
Note: Speed settings are saved automatically and persist across all projects.
Spawn Point
The spawn point is the starting position each time you enter a scene. Click to instantly jump back to the spawn point.
As of V2.2, spawn point data is stored bound to the LCC file and travels with it. See Spawn Point.
Point Cloud Toggle
Switch the scene from normal rendering to point cloud display mode to inspect data distribution and scan density. Click again to return to normal rendering.
View Mode Toggle
Switch between scene navigation modes:
| Mode | Best For | Controls |
|---|---|---|
| First-Person | Immersive browsing, simulating on-site walking | W A S D to move, mouse to look |
| Pivot | Inspecting details around a focal point | Left-drag to orbit, right-drag to pan, scroll to zoom |
| Avatar | Walking through the scene as a virtual character | Click ground to move, auto-pathfinding |
Screenshot
Capture the current view as an image for reports or sharing.
Steps:
- Click the screenshot button
- Select the aspect ratio
- Adjust the angle and click to capture
- The photo is automatically saved to the Media folder in the asset list; right-click to export
Height Filter
Hide scene content above or below a specified height range to isolate a single floor or area.
Steps:
- Click the height filter button
- Drag the top/bottom sliders to set the visible height range
- Click the button again to exit